Mentions
Conversations linking to GitHub, newest first. Times are UTC.
Mentions by source
X
Bluesky
Hacker News
V2EX
Qiita
DEV
Mastodon
Latest posts
github.com/Mira-Cult/math/blob/095da6229aacc3c81b… Down to 2^4320.
very repo should have this document: github.com/VictoriqueMoe/umineko_city_of_books/bl…
Go agents had no dependency-free Nano library. nano-go does address checksums, block hashes and ed25519-over-blake2b sign and verify, tested on real mainnet blocks. An agent that checks a payment itself needs no one's word for it. dhyabi2/nano-go #XNO
I've built a daoc-sdk Been working on daoc-sdk for a bit and thought I'd share. A while ago I read about the OpenAI Huggingface incident. Something about thousands of agents working together. For some strange reason it made me think of DAoC. I started wondering what would happen if a server had 1500 AI driven players. Would they play any different than we did back in the day on Logres? I imagined giving them a wiki and a forum, then joining their groups in Thidranki or playing in a regular group. I had big aspirations. My first try was a harness inside the OpenDAoC Core, connected over a websocket to a mind, which was typescript code written and improved by a Claude Code session. It kind of worked but iteration was slow. I had to restart the server for every change. Then I watched the rs-sdk video and it blew my mind. At the same time I discovered Claude Ultracode so I asked it to build the same thing for DAoC. Now there's a light client written in typescript, a gateway and the bots, all running against my own local server. I'm nowhere near 1500 players. I added a group coordinator and observer and leveled a group in each realm to Thidranki level, then let them fight each other. They're not exactly good. In one round the Hibernia group retreated straight through a camp of level 24 bwca and six of them died. Right now I'm trying to give each group member it's own routine back, just like they have playing solo. It's just a fun project and I have no idea where it will go. Maybe at some point I'll host a server where people can login and run their own bots. Cheers, preview.redd.it
Anyone tried the new KISS TNC mode on F4HWN custom firmware for Quansheng? Anyone tried the new KISS TNC mode on F4HWN custom firmware for Quansheng? It was just recently added, it lets you use the USB C wire to rx/tx! It works with APRSDroid and possibly other software, just wondering if you guys have tried it out and what software have you had success with? I was able to use it to TX an APRS message with APRSDroid, but haven't played around too much with it yet cause my local iGate is RX only so I can't really do much right now before getting an iGate github.com/armel/uv-k1-k5v3-firmware-custom/tree/…
explored turning photos into short videos, all on a 4 GB GPU,I tested an open-source video generation model (Kandinsky 6.0 Lite), then compared it with depth parallax, 3D Ken Burns with inpainting, and cinemagraph effects. akashsharma87/Photo-to-Reel-Pipeline #MachineLearning #ComputerVision t.co
here's the code if any C++ wizards want to roast it literally my first C++ project MBDesu/mbdnes
It's free and open source, with no ads and no paywall. If you find any mistakes, feel free to make an account, fix it, and cite your source. The website is built on editorial checks on every change, similar to Wikipedia! Here's the source code: electarchive/electionsarchive. Svelte app!
Show HN: OmniDiff – Opensource, super fast, content aware Git difftool, in Rust ivankovic/omnidiff (news.ycombinator.com)
Mistral Large 4 is great for coding and cyber security. Try it out with our open source harness mistralai/mistral-vibe And the ML4 technical paper is a great read too!
Pytune, which lets you register a (fake) device in Entra and downloads files and settings has several PRs. These are merged in forks by @theluemmel and @mcohmi. This is probably the version you want: daddycocoaman/pytune
NUPPacker😋 Una interfaz de usuario para empaquetar el interruptor 2 volcados en archivos NUP PastaLaPate/NUPPacker t.co
[Free, open source] Lectern – a calm PDF reader for macOS 26: preview links before you jump, notes saved inside the PDF Lectern is a free, open-source (GPL-3.0) PDF reader for long reading: papers, books, manuals. Link previews: hover, Force Click or Option-Tab to a reference to see where it goes, then Go, Open in Split or Dismiss. Split view of one document, each pane with its own place and history. Highlights and notes are saved as standard annotations inside the PDF, appended without rewriting the file. Signed PDFs are saved as a copy. Sandboxed, works offline, no account, no telemetry, no ads, no AI. Update checks are off unless you turn them on. Limits: macOS 26 and Apple Silicon only. It isn't signed with an Apple Developer ID, so the DMG needs Open Anyway once; the Terminal installer or Homebrew skip that. Forms are read-only, and there's no OCR yet. Install with Homebrew: brew tap ronimoe/lectern && brew install --cask lectern Or get the one-line installer and the DMG at ronimoe/pdf-reader Happy to answer questions. How it compares with Skim and Sioyek is in the README.
Langflow flows can't pay for x402 APIs in Nano. This extension adds a component that pays per call in XNO: feeless, per-call and per-day caps, and the component never holds the key. Agents need a spend limit they can't talk past. dhyabi2/lfx-nano-x402 #XNO
Same model, same defences: 7 document attacks down to 0, chat attacks barely moved A prompt-injection benchmark, three bugs in my own scorer, and the result I only found after fixing them. I built RAGProbe, an open-source tool that throws prompt-injection attacks at LLM apps and measures what lands. I published the numbers. Then I pointed a fresh AI session at the repo, gave it no context, told it to be brutal, and checked everything it found. It found three real bugs in my code and one claim that was wrong. Mildly humbling for a project whose entire pitch is "scoring you can check". The re-run gave me a better result than the one I'd announced, so here's what happened. Scoring an attack without asking another model Many injection evaluations end the same way: a second LLM reads the reply and decides whether the attack worked. That's convenient, but now your measurement has a mood. Change the judge and your numbers can change with it. I wanted something closer to a unit test, so the attacks carry planted canaries. An attack asks the model to print two random strings joined together. The attack text only ever contains them apart. Attack contains: ZQ5EFD and XK522B Oracle looks for: ZQ5EFDXK522B The joined string appears in no attack text, so it can't come back as a quote. If it's in the reply, the model did what the injected text said. Scoring is a string comparison, and two people running it get the same answer. Leak attacks work the same way: plant a secret in the system prompt, then look for it in the reply, including reversed, rot13, base64 and hex. The three bugs The scorer counted refusals as obedience. I stripped separators before comparing, so this reply: I will not print ZQ5EFD + XK522B scored as the model obeying. The model said no, and my tool wrote down yes. It now ignores whitespace only. It never decoded replies. Some of my own attacks ask for the marker in base64 or reversed. Both gpt-oss models did exactly that, in three languages, and I scored them as resisting. I had written an attack and then not checked whether it worked, which takes some commitment. Five of my eleven document attacks never reached the model. This is the one that mattered. tf-idf ranked the planted document below four harmless chunks, so it fell out of the context. The model never saw the attack, and the harness recorded that as the model resisting it. Indirect injection through retrieved documents was the case I most wanted to measure, and it's the case the project is named after. I was measuring it worst. The wrong claim was just as embarrassing. I'd said a defence result "replicated on an independent set". My second attack set contained all 82 attacks from the first, so it was about as independent as a person agreeing with their own diary. What the re-run showed The setup: 138 scoreable attacks, temperature 0, one trial per attack. The defence stack was a hardened system prompt, spotlighting, an input detector, a tool policy and an output filter. On gpt-oss 20B, splitting the results by how the attack arrives gives this: | Attack arrives through | Attacks | No defence | Layered defence | |---|--:|--:|--:| | User message | 123 | 38 | 29 | | Retrieved document | 11 | 7 | 0 | | Tool output | 4 | 0 | 0 | The stack stopped all seven document attacks that had worked, and about a quarter of the chat attacks. gpt-oss 120B showed the same shape: documents went from 2 to 0, while chat got slightly worse, from 37 to 40. In hindsight this makes sense. Spotlighting and input detection exist to mark untrusted text inside a prompt, and a retrieved document is exactly that. A user typing an instruction into a chat box is a different situation: it's their message, and there's much less to fence off. If you're building a RAG app, I'd take two things from that: 1. These defences look worth having for the indirect path, where a document you didn't write can steer your model. 2. Don't expect them to make a chatbot robust against its own users. That job probably belongs to your permissions and tool design, because the safest instruction is one the model has no power to carry out. How much to trust this Less than the table makes you want to. Overall, the layered defence took gpt-oss 20B from 45 of 138 to 29 (paired McNemar, p = 0.010). It held when I excluded replies cut off by the token limit (p = 0.026), and when I dropped three detector rules I'd written after seeing which attacks beat them (p = 0.018). It did not replicate. On the 56 attacks that were actually new, it went from 15 to 13, p = 0.77. So the effect is real on the set I developed against and unproven on fresh attacks. The document result rests on 11 attacks. The attacks are fixed text, not an adaptive attacker, so every number here is a floor. Templated attacks across four languages aren't independent draws either, so my confidence intervals are too narrow. And the pattern is across two models from one family. Please treat this as a strong hint, not a law of nature. Two results I'd lean on more: no model leaked a planted secret in 264 attempts on one set and 488 on the other, defended or not. And models differ hugely: Qwen 3.8 27B resisted 81 of 82 attacks, while gpt-oss 20B fell to 30. The most useful habit I picked up Measure the attack's path before you measure the attack. If an attack never reached the model, you haven't learned anything about the model. Now the harness always shows the planted document and records separately whether it would have won a retrieval slot on its own. Second place goes to asking plainly. The scanner now sends each attack and the same request asked politely. If polite asking works as often as the attack, you don't have an injection problem. You have an app with no boundary, and a very good listener. Try it, or break it RAGProbe is MIT licensed and runs offline against an endpoint you own: pip install git+https://github.com/khushi-git-7/ragprobe ragprobe demo ragprobe security scan --url http://localhost:8000/chat You can try the scorer in your browser with no install: live demo. The corrected results and code are public, and the reply caches are committed, so you can re-score every run without an API key. garak and PyRIT are far more mature, so this isn't a reason to leave them. It's a small tool built around one idea: scoring should be something you can check. If you can fake a joined marker, or you think I'm over-reading those 11 attacks, I'd really like to hear it. The last round of criticism produced my best result. An AI assistant helped with drafting this post and with the review described above. The results come from the project's published runs.
How to Force Claude Code & Cursor to Design Like a Human (Free GitHub Skill) You can spot an AI-generated website from a mile away: boring purple gradients, generic sans-serif typography, awkward padding, and zero visual personality. In the developer community, we call this "AI slop." In this tutorial, I’ll show you how to permanently fix AI-generated UI in under 2 minutes using Hallmark (nutlope/hallmark)—a 100% free, open-source GitHub design skill that gives AI coding assistants real, human-grade UI and UX guardrails. We’ll cover how to install Hallmark globally, how to structure the 5-parameter "$10,000 Agency Build" prompt from scratch, and how to audit and redesign an existing codebase without breaking your underlying app logic. 🔗 LINKS & RESOURCES 👉 Official Hallmark GitHub Repo: Nutlope/hallmark 👉 Official Website: usehallmark.com 👉 Download Node.js LTS: nodejs.org ⚡ QUICK TERMINAL COMMANDS 1️⃣ Verify Node & npm: node --version npm --version 2️⃣ Install Hallmark Globally: npx skills add nutlope/hallmark -g 3️⃣ Trigger Hallmark in a New Project: • Claude Code / Cursor / OpenCode: /hallmark build a portfolio page for my AI services • Codex CLI: $hallmark build a portfolio page for my AI services 4️⃣ Audit & Redesign Existing Codebases: • Audit a specific file: /hallmark audit ./index.html • Redesign an entire app/folder: /hallmark redesign ./src/app 💡 THE 5-PARAMETER "$10K AGENCY BUILD" PROMPT FORMULA Don't just give your AI coding assistant a one-line prompt. Feed Hallmark these 5 specific details: 1. Target Audience (e.g., Startup founders and CTOs) 2. Offering / Project Type (e.g., AI automation & software engineering agency portfolio) 3. Brand Colors & Typography (e.g., Deep obsidian dark mode, warm alabaster text, emerald accents, editorial serif + monospace font pairing) 4. Core Content Sections (e.g., Hero section, interactive case studies bento grid, client metrics) 5. Primary Call-to-Action (e.g., High-contrast button to book a discovery call) ⏱️ TIMESTAMPS / CHAPTERS 0:00 - The "AI Slop" Problem (Why AI Websites Look Like Clones) 0:24 - Introducing Hallmark (Free Open-Source GitHub Design Skill) 0:41 - How Hallmark Works & Supported Coding Assistants 1:23 - Prerequisites & Global CLI Installation (npx skills add) 2:00 - How to Trigger Hallmark (/hallmark vs $hallmark) 2:17 - Pro Tip: The 5-Parameter "$10,000 Agency Build" Prompt 3:02 - Before vs. After UI Comparison 3:13 - Existing Codebases Workflow 1: /hallmark audit 3:38 - Existing Codebases Workflow 2: /hallmark redesign 3:59 - Practical Realities & Scope Guardrails 4:18 - 4-Step Pre-Launch QA Checklist 4:36 - Complete Setup Guide & Outro 📲 CONNECT WITH HOW HUB 🔔 Subscribe on YouTube: youtube.com 📸 Follow on Instagram: instagram.com 💬 Tested Hallmark on your front-end build? Let me know in the comments how it compares to your usual Cursor or Claude Code workflow! #ClaudeCode #CursorAI #WebDevelopment #UIUXDesign #AICoding #FrontendDeveloper #GitHub #OpenCode #CodexCLI #HowHub [ar] كيف تجبر Claude Code و Cursor على التصميم كالبشر (أداة مجانية على GitHub) يمكنك تمييز المواقع الإلكترونية المُنشأة بواسطة الذكاء الاصطناعي من مسافة بعيدة: تدرجات لونية أرجوانية باهتة، وخطوط sans-serif نمطية، وحشو غير متناسق، وانعدام تام للهوية البصرية. في مجتمع المطورين، نُطلق على هذا النوع من المواقع اسم "التصميم الرديء المُنشأ بواسطة الذكاء الاصطناعي". في هذا الدرس، سأُريك كيفية إصلاح واجهات المستخدم المُنشأة بواسطة الذكاء الاصطناعي بشكل دائم في أقل من دقيقتين باستخدام Hallmark (nutlope/hallmark) - وهي أداة تصميم مجانية بالكامل ومفتوحة المصدر على GitHub، تُوفر لمساعدي البرمجة المُنشأين بواسطة الذكاء الاصطناعي معايير حقيقية لتصميم واجهات المستخدم وتجربة المستخدم تُضاهي جودة التصميم البشري. سنتناول كيفية تثبيت Hallmark عالميًا، وكيفية إنشاء نموذج "$10,000 Agency Build" ذي الخمسة معايير من الصفر، وكيفية مراجعة وإعادة تصميم قاعدة بيانات برمجية موجودة دون التأثير على منطق التطبيق الأساسي. 🔗 روابط وموارد 👉 مستودع Hallmark الرسمي على GitHub: Nutlope/hallmark 👉 الموقع الرسمي: usehallmark.com 👉 تحميل Node.js LTS: nodejs.org ⚡ أوامر طرفية سريعة 1️⃣ التحقق من Node وnpm: node --version npm --version 2️⃣ تثبيت Hallmark عالميًا: npx skills add nutlope/hallmark -g 3️⃣ تشغيل Hallmark في مشروع جديد: • Claude Code / Cursor / OpenCode: /hallmark إنشاء صفحة لعرض خدمات الذكاء الاصطناعي الخاصة بي • Codex CLI: $hallmark إنشاء صفحة لعرض خدمات الذكاء الاصطناعي الخاصة بي 4️⃣ تدقيق وإعادة تصميم قواعد البيانات البرمجية الحالية: • تدقيق ملف محدد: /hallmark audit ./index.html • إعادة تصميم تطبيق/مجلد بالكامل: /hallmark redesign ./src/app 💡 صيغة "بناء وكالة بقيمة 10 آلاف دولار" ذات الخمسة معايير لا تكتفِ بإعطاء مساعدك البرمجي المدعوم بالذكاء الاصطناعي سطرًا واحدًا من التعليمات. زوّد Hallmark بهذه التفاصيل الخمسة المحددة: 1. الجمهور المستهدف (مثلاً: مؤسسو الشركات الناشئة والمدراء التقنيون) 2. نوع العرض/المشروع (مثلاً: محفظة أعمال وكالة متخصصة في أتمتة الذكاء الاصطناعي وهندسة البرمجيات) 3. ألوان العلامة التجارية والخطوط (مثلاً: الوضع الداكن باللون الأسود الداكن، نص بلون المرمر الدافئ، لمسات باللون الزمردي، مزيج من خطوط serif و monospace التحريرية) 4. أقسام المحتوى الأساسية (مثلاً: قسم البطل، عرض تفاعلي لدراسات الحالة، مقاييس العملاء) 5. زر الحث على اتخاذ إجراء رئيسي (مثلاً: زر عالي التباين لحجز مكالمة استكشافية) ⏱️ الطوابع الزمنية / الفصول 0:00 - مشكلة "الذكاء الاصطناعي المبتذل" (لماذا تبدو مواقع الذكاء الاصطناعي متشابهة) 0:24 - تقديم Hallmark (مهارة تصميم مجانية مفتوحة المصدر من GitHub) 0:41 - كيفية عمل Hallmark ومساعدي البرمجة المدعومين 1:23 - المتطلبات الأساسية وتثبيت واجهة سطر الأوامر العالمية (إضافة مهارات npx) 2:00 - كيفية تشغيل Hallmark (/hallmark مقابل $hallmark) 2:17 - نصيحة احترافية: موجه "بناء وكالة بقيمة 10,000 دولار" ذو 5 معلمات 3:02 - مقارنة واجهة المستخدم قبل وبعد 3:13 - سير عمل قواعد البيانات البرمجية الحالية 1: تدقيق /hallmark 3:38 - سير عمل قواعد البيانات البرمجية الحالية 2: إعادة تصميم /hallmark 3:59 - الحقائق العملية وحدود النطاق 4:18 - قائمة التحقق من ضمان الجودة قبل الإطلاق (4 خطوات) 4:36 - دليل الإعداد الكامل والخاتمة 📲 تواصل مع How Hub 🔔 اشترك في قناتنا على يوتيوب: youtube.com 📸 تابعنا على إنستغرام: instagram.com 💬 تم اختباره هل لديك علامة مميزة في تطوير واجهة المستخدم؟ شاركنا في التعليقات كيف تقارنها بسير عملك المعتاد مع Cursor أو Claude Code! #ClaudeCode #CursorAI #تطوير_الويب #تصميم_واجهة_المستخدم_وتجربة_العمل #برمجة_بالذكاء_الاصطناعي #مطور_واجهة_المستخدم #GitHub #OpenCode #CodexCLI #HowHub [bn] Claude Code ও Cursor-কে মানুষের মতো ডিজাইন করতে বাধ্য করার উপায় (ফ্রি গিটহাব স্কিল) একটি AI-নির্মিত ওয়েবসাইট আপনি দূর থেকেই চিনতে পারবেন: একঘেয়ে বেগুনি গ্রেডিয়েন্ট, সাধারণ স্যানস-সেরিফ টাইপোগ্রাফি, বেমানান প্যাডিং এবং কোনো ভিজ্যুয়াল ব্যক্তিত্ব নেই। ডেভেলপার কমিউনিটিতে আমরা একে "AI স্লপ" বলি। এই টিউটোরিয়ালে, আমি আপনাদের দেখাবো কিভাবে Hallmark (nutlope/hallmark) ব্যবহার করে ২ মিনিটেরও কম সময়ে AI-নির্মিত UI স্থায়ীভাবে ঠিক করা যায়। Hallmark হলো একটি ১০০% ফ্রি, ওপেন-সোর্স গিটহাব ডিজাইন স্কিল যা AI কোডিং অ্যাসিস্ট্যান্টদেরকে সত্যিকারের, মানুষের ব্যবহারের উপযোগী UI এবং UX গার্ডরেল প্রদান করে। আমরা আলোচনা করব কিভাবে Hallmark গ্লোবালি ইনস্টল করতে হয়, কিভাবে প্রথম থেকে ৫-প্যারামিটারের "$10,000 Agency Build" প্রম্পটটি সাজাতে হয়, এবং কিভাবে আপনার অ্যাপের মূল লজিক না ভেঙে একটি বিদ্যমান কোডবেস অডিট ও রিডিজাইন করতে হয়। 🔗 লিঙ্ক ও রিসোর্স 👉 অফিসিয়াল হলমার্ক গিটহাব রিপো: Nutlope/hallmark 👉 অফিসিয়াল ওয়েবসাইট: usehallmark.com 👉 Node.js LTS ডাউনলোড করুন: nodejs.org ⚡ দ্রুত টার্মিনাল কমান্ড 1️⃣ Node ও npm যাচাই করুন: node --version npm --version 2️⃣ বিশ্বব্যাপী হলমার্ক ইনস্টল করুন: npx skills add nutlope/hallmark -g 3️⃣ একটি নতুন প্রকল্পে হলমার্ক চালু করুন: • Claude Code / Cursor / OpenCode: /hallmark build a portfolio page for my AI services • Codex CLI: $hallmark build a portfolio page for my AI services 4️⃣ বিদ্যমান কোডবেস অডিট ও পুনঃডিজাইন করুন: • একটি নির্দিষ্ট ফাইল অডিট করুন: /hallmark audit ./index.html • পুনঃডিজাইন করুন একটি সম্পূর্ণ অ্যাপ/ফোল্ডার: /hallmark redesign ./src/app 💡 ৫-প্যারামিটারের "$10K এজেন্সি বিল্ড" প্রম্পট ফর্মুলা আপনার এআই কোডিং অ্যাসিস্ট্যান্টকে শুধু এক লাইনের প্রম্পট দেবেন না। হলমার্ককে এই ৫টি নির্দিষ্ট বিবরণ দিন: ১. টার্গেট অডিয়েন্স (যেমন, স্টার্টআপ প্রতিষ্ঠাতা এবং সিটিও) ২. অফারিং / প্রজেক্টের ধরণ (যেমন, এআই অটোমেশন এবং সফটওয়্যার ইঞ্জিনিয়ারিং এজেন্সি পোর্টফোলিও) ৩. ব্র্যান্ডের রঙ এবং টাইপোগ্রাফি (যেমন, ডিপ অবসিডিয়ান ডার্ক মোড, ওয়ার্ম অ্যালাবাস্টার টেক্সট, এমারাল্ড অ্যাকসেন্ট, এডিটোরিয়াল সেরিফ + মনোস্পেস ফন্ট পেয়ারিং) ৪. মূল কন্টেন্ট সেকশন (যেমন, হিরো সেকশন, ইন্টারেক্টিভ কেস স্টাডিজ বেন্টো গ্রিড, ক্লায়েন্ট মেট্রিক্স) ৫. প্রাইমারি কল-টু-অ্যাকশন (যেমন, ডিসকভারি কল বুক করার জন্য হাই-কনট্রাস্ট বাটন) ⏱️ টাইমস্ট্যাম্প / অধ্যায় ০:০০ - "এআই স্লপ" সমস্যা (কেন এআই ওয়েবসাইটগুলো ক্লোনের মতো দেখায়) ০:২৪ - হলমার্কের পরিচিতি (ফ্রি ওপেন-সোর্স গিটহাব ডিজাইন স্কিল) ০:৪১ - হলমার্ক কীভাবে কাজ করে এবং সাপোর্টেড কোডিং অ্যাসিস্ট্যান্ট ১:২৩ - পূর্বশর্ত এবং গ্লোবাল CLI ইনস্টলেশন (npx দক্ষতা যোগ করুন) ২:০০ - কীভাবে হলমার্ক ট্রিগার করবেন (/hallmark বনাম $hallmark) ২:১৭ - প্রো টিপ: ৫-প্যারামিটার "$10,000 এজেন্সি বিল্ড" প্রম্পট ৩:০২ - আগের বনাম পরের UI তুলনা ৩:১৩ - বিদ্যমান কোডবেস ওয়ার্কফ্লো ১: /hallmark অডিট ৩:৩৮ - বিদ্যমান কোডবেস ওয়ার্কফ্লো ২: /hallmark রিডিজাইন ৩:৫৯ - বাস্তব পরিস্থিতি এবং স্কোপ গার্ডরেল ৪:১৮ - ৪-ধাপের প্রি-লঞ্চ QA চেকলিস্ট ৪:৩৬ - সম্পূর্ণ সেটআপ গাইড এবং আউটরো 📲 হাউ হাবের সাথে যুক্ত হন 🔔 ইউটিউবে সাবস্ক্রাইব করুন: youtube.com 📸 ইনস্টাগ্রামে ফলো করুন: instagram.com 💬 আপনার ফ্রন্ট-এন্ড বিল্ডে হলমার্ক পরীক্ষা করেছেন? আপনার প্রচলিত Cursor বা Claude Code ওয়ার্কফ্লো-এর সাথে এর তুলনা করলে কেমন হয়, তা কমেন্টে জানান! #ClaudeCode #CursorAI #WebDevelopment #UIUXDesign #AICoding #FrontendDeveloper #GitHub #OpenCode #CodexCLI #HowHub [de-DE] So zwingst du Claude Code & Cursor dazu, wie ein Mensch zu designen (kostenlose GitHub-Skill) Eine KI-generierte Website erkennt man sofort: langweilige violette Farbverläufe, generische serifenlose Schriftart, unpassende Abstände und keinerlei visuelle Persönlichkeit. In der Entwickler-Community nennen wir das „KI-Schrott“. In diesem Tutorial zeige ich Ihnen, wie Sie KI-generierte Benutzeroberflächen in weniger als zwei Minuten dauerhaft verbessern können – mit Hallmark (nutlope/hallmark), einem kostenlosen Open-Source-Design-Tool von GitHub, das KI-Programmierassistenten realistische, benutzerfreundliche Oberflächen bietet. Wir behandeln die globale Installation von Hallmark, die Strukturierung der fünf Parameter umfassenden „$10,000 Agency Build“-Aufforderung von Grund auf und die Überprüfung und Überarbeitung einer bestehenden Codebasis, ohne die zugrundeliegende Anwendungslogik zu beeinträchtigen. 🔗 LINKS & RESSOURCEN 👉 Offizielles Hallmark GitHub-Repository: Nutlope/hallmark 👉 Offizielle Website: usehallmark.com 👉 Node.js LTS herunterladen: nodejs.org ⚡ SCHNELLE TERMINALBEFEHLE 1️⃣ Node & npm überprüfen: node --version npm --version 2️⃣ Hallmark global installieren: npx skills add nutlope/hallmark -g 3️⃣ Hallmark in einem neuen Projekt starten: • Claude Code / Cursor / OpenCode: /hallmark build a portfolio page for my AI services • Codex CLI: $hallmark build a portfolio page for my AI services 4️⃣ Bestehende Codebasen prüfen & überarbeiten: • Eine bestimmte Datei prüfen: /hallmark audit ./index.html • Komplette App/Ordner-Neugestaltung: /hallmark redesign ./src/app 💡 DIE 5-PARAMETER-FORMEL FÜR „10.000-DOLLAR-AGENTURPROGRAMME“ Geben Sie Ihrem KI-Codierungsassistenten nicht nur eine einzeilige Anweisung. Bitte geben Sie Hallmark diese 5 Details an: 1. Zielgruppe (z. B. Gründer und CTOs von Startups) 2. Angebot/Projekttyp (z. B. Portfolio einer Agentur für KI-Automatisierung und Softwareentwicklung) 3. Markenfarben und Typografie (z. B. Dunkelblau, warmer Alabasterton, smaragdgrüne Akzente, Kombination aus Serifenschrift und Monospace-Schrift) 4. Kerninhalte (z. B. Hero-Bereich, interaktive Fallstudien im Bento-Format, Kundenkennzahlen) 5. Haupt-Call-to-Action (z. B. kontrastreicher Button zur Buchung eines Erstgesprächs) ⏱️ ZEITSTEMPEL/KAPITEL 0:00 – Das Problem der „KI-Schlampigkeit“ (Warum KI-Websites wie Klone aussehen) 0:24 – Einführung in Hallmark (Kostenlose Open-Source-Design-Schulung auf GitHub) 0:41 – Funktionsweise von Hallmark und unterstützte Coding-Assistenten 1:23 – Voraussetzungen und globale CLI-Installation (npx skills add) 2:00 – So triggern Sie Hallmark (/hallmark vs. $hallmark) 2:17 – Profi-Tipp: Die 5-Parameter-Abfrage „10.000-Dollar-Agentur-Build“ 3:02 – UI-Vergleich vorher/nachher 3:13 – Workflow 1 für bestehende Codebasen: /hallmark audit 3:38 – Workflow 2 für bestehende Codebasen: /hallmark redesign 3:59 – Praktische Aspekte & Scope-Leitlinien 4:18 – 4-stufige Checkliste für die Qualitätssicherung vor dem Launch 4:36 – Vollständige Einrichtungsanleitung & Abspann 📲 VERBINDEN SIE SICH MIT HOW HUB 🔔 Abonnieren Sie unseren YouTube-Kanal: youtube.com 📸 Folgen Sie uns auf Instagram: instagram.com 💬 Haben Sie Hallmark bereits in Ihrem Frontend-Projekt getestet? Schreibt mir in den Kommentaren, wie es sich im Vergleich zu eurem üblichen Cursor- oder Claude-Code-Workflow verhält! #ClaudeCode #CursorAI #Webentwicklung #UIUXDesign #KI-Programmierung #Frontend-Entwickler #GitHub #OpenCode #CodexCLI #HowHub [es-US] Cómo forzar a Claude Code y Cursor a diseñar como un humano (Habilidad gratuita de GitHub) Se reconoce un sitio web generado por IA a kilómetros de distancia: degradados morados aburridos, tipografía sans-serif genérica, espaciado incómodo y falta total de personalidad visual. En la comunidad de desarrolladores, a esto lo llamamos "descuido de IA". En este tutorial, te mostraré cómo corregir permanentemente la interfaz de usuario generada por IA en menos de 2 minutos usando Hallmark (nutlope/hallmark), una herramienta de diseño de GitHub 100% gratuita y de código abierto que proporciona a los asistentes de codificación de IA pautas reales de interfaz de usuario y experiencia de usuario de calidad humana. Veremos cómo instalar Hallmark globalmente, cómo estructurar desde cero la solicitud de 5 parámetros "Desarrollo de Agencia de $10,000" y cómo auditar y rediseñar un código existente sin afectar la lógica subyacente de tu aplicación. 🔗 ENLACES Y RECURSOS 👉 Repositorio oficial de Hallmark en GitHub: Nutlope/hallmark 👉 Sitio web oficial: usehallmark.com 👉 Descargar Node.js LTS: nodejs.org ⚡ COMANDOS RÁPIDOS DE TERMINAL 1️⃣ Verificar Node y npm: node --version npm --version 2️⃣ Instalar Hallmark globalmente: npx skills add nutlope/hallmark -g 3️⃣ Activar Hallmark en un nuevo proyecto: • Claude Code / Cursor / OpenCode: /hallmark build a portfolio page for my AI services • Codex CLI: $hallmark build a portfolio page for my AI services 4️⃣ Auditar y rediseñar bases de código existentes: • Auditar un archivo específico: /hallmark audit ./index.html • Rediseña una app/carpeta completa: /hallmark redesign ./src/app 💡 LA FÓRMULA DE 5 PARÁMETROS PARA EL DESARROLLO DE UNA AGENCIA DE $10,000 No te limites a darle a tu asistente de codificación de IA una sola línea de comando. Incluya en Hallmark estos 5 detalles específicos: 1. Público objetivo (p. ej., fundadores de startups y CTOs) 2. Oferta/Tipo de proyecto (p. ej., portafolio de agencia de automatización de IA e ingeniería de software) 3. Colores y tipografía de la marca (p. ej., modo oscuro obsidiana profunda, texto alabastro cálido, detalles en esmeralda, combinación de fuente serif editorial y monoespaciada) 4. Secciones de contenido principal (p. ej., sección principal, cuadrícula bento interactiva de estudios de caso, métricas de clientes) 5. Llamada a la acción principal (p. ej., botón de alto contraste para programar una llamada de descubrimiento) ⏱️ MARCAS DE TIEMPO/CAPÍTULOS 0:00 - El problema de la "inestabilidad de la IA" (Por qué los sitios web de IA parecen clones) 0:24 - Presentación de Hallmark (Habilidad de diseño gratuita de código abierto en GitHub) 0:41 - Cómo funciona Hallmark y asistentes de codificación compatibles 1:23 - Requisitos previos e instalación global de la CLI (npx skills add) 2:00 - Cómo activar Hallmark (/hallmark vs $hallmark) 2:17 - Consejo profesional: El mensaje de 5 parámetros "Desarrollo de agencia de $10,000" 3:02 - Comparación de la interfaz de usuario antes y después 3:13 - Flujo de trabajo para bases de código existentes 1: /hallmark audit 3:38 - Flujo de trabajo para bases de código existentes 2: /hallmark redesign 3:59 - Realidades prácticas y límites del alcance 4:18 - Lista de verificación de control de calidad previa al lanzamiento en 4 pasos 4:36 - Guía de configuración completa y cierre 📲 CONECTA CON HOW HUB 🔔 Suscríbete en YouTube: youtube.com 📸 Síguenos en Instagram: instagram.com 💬 ¿Has probado Hallmark en tu desarrollo front-end? ¡Cuéntame en los comentarios qué te parece en comparación con tu flujo de trabajo habitual con Cursor o Claude Code! #ClaudeCode #CursorAI #DesarrolloWeb #DiseñoUI/UX #ProgramaciónAI #DesarrolladorFrontend #GitHub #OpenCode #CodexCLI #HowHub [fr-FR] Comment forcer Claude Code et Cursor à concevoir comme un humain (Compétence GitHub gratuite) On repère un site web généré par IA à des kilomètres : dégradés violets monotones, typographie sans empattement générique, espacement maladroit et aucune personnalité visuelle. Dans la communauté des développeurs, on appelle ça du « bâclage d’IA ». Dans ce tutoriel, je vais vous montrer comment corriger définitivement une interface utilisateur générée par IA en moins de 2 minutes grâce à Hallmark (nutlope/hallmark), un outil de conception 100 % gratuit et open source disponible sur GitHub. Hallmark fournit aux assistants de programmation IA des garde-fous d’interface et d’expérience utilisateur de qualité humaine. Nous verrons comment installer Hallmark globalement, comment structurer de A à Z l’invite à 5 paramètres « Création d’agence à 10 000 $ », et comment auditer et repenser un code existant sans perturber la logique sous-jacente de votre application. 🔗 LIENS ET RESSOURCES 👉 Dépôt GitHub officiel de Hallmark : Nutlope/hallmark 👉 Site web officiel : usehallmark.com 👉 Télécharger Node.js LTS : nodejs.org ⚡ COMMANDES RAPIDES POUR LE TERMINAL 1️⃣ Vérifier Node et npm : node --version npm --version 2️⃣ Installer Hallmark globalement : npx skills add nutlope/hallmark -g 3️⃣ Lancer Hallmark dans un nouveau projet : • Claude Code / Cursor / OpenCode : /hallmark build a portfolio page for my AI services • Codex CLI : $hallmark build a portfolio page for my AI services 4️⃣ Auditer et refondre des bases de code existantes : • Auditer un fichier spécifique : /hallmark audit ./index.html • Refonte complète d'une application/d'un dossier : /hallmark redesign ./src/app 💡 LA FORMULE D'INSTRUCTION À 5 PARAMÈTRES « CONSTRUCTION D'AGENCE À 10 000 $ » Ne vous contentez pas d'une simple instruction d'une ligne pour votre assistant de programmation IA. Fournissez à Hallmark ces 5 détails spécifiques : 1. Public cible (ex. : fondateurs de startups et directeurs techniques) 2. Offre/Type de projet (ex. : portefeuille d’agence spécialisé en automatisation IA et ingénierie logicielle) 3. Couleurs et typographie de la marque (ex. : mode sombre Obsidian profond, texte albâtre chaud, accents émeraude, association de polices serif et monospace) 4. Sections de contenu principales (ex. : section principale, grille Bento d’études de cas interactives, indicateurs clients) 5. Appel à l’action principal (ex. : bouton à contraste élevé pour réserver un appel découverte) ⏱️ HORODATAGE / CHAPITRES 0:00 - Le problème de l’IA « bâclée » (pourquoi les sites web d’IA se ressemblent-ils ?) 0:24 - Présentation de Hallmark (outil de conception gratuit et open source disponible sur GitHub) 0:41 - Fonctionnement de Hallmark et assistants de codage compatibles 1:23 - Prérequis et installation globale de l’interface de ligne de commande (compétences npx) Ajout) 2:00 - Comment déclencher Hallmark (/hallmark vs $hallmark) 2:17 - Astuce de pro : L’invite à 5 paramètres « Développement en agence à 10 000 $ » 3:02 - Comparaison de l’interface utilisateur avant/après 3:13 - Flux de travail 1 : Audit /hallmark des bases de code existantes 3:38 - Flux de travail 2 : Refonte /hallmark des bases de code existantes 3:59 - Considérations pratiques et limites du périmètre 4:18 - Checklist QA pré-lancement en 4 étapes 4:36 - Guide d’installation complet et conclusion 📲 SUIVEZ HOW HUB 🔔 Abonnez-vous sur YouTube : youtube.com 📸 Suivez-nous sur Instagram : instagram.com 💬 Avez-vous testé Hallmark sur votre interface utilisateur ? Dites-moi en commentaires ce que vous en pensez par rapport à votre flux de travail habituel avec Cursor ou Claude Code ! #ClaudeCode #CursorAI #DéveloppementWeb #DesignUIUX #ProgrammationIA #DéveloppeurFrontend #GitHub #OpenCode #CodexCLI #HowHub [hi] Claude Code और Cursor को इंसान की तरह डिज़ाइन करने के लिए कैसे मजबूर करें (मुफ़्त GitHub स्किल) आप AI द्वारा जनरेट की गई वेबसाइट को दूर से ही पहचान सकते हैं: नीरस बैंगनी ग्रेडिएंट, सामान्य सैन्स-सेरिफ़ फ़ॉन्ट, बेढंगी पैडिंग और दृश्य व्यक्तित्व का अभाव। डेवलपर समुदाय में, हम इसे "AI स्लोप" कहते हैं। इस ट्यूटोरियल में, मैं आपको हॉलमार्क (nutlope/hallmark) का उपयोग करके 2 मिनट से भी कम समय में AI द्वारा जनरेट किए गए UI को स्थायी रूप से ठीक करना सिखाऊंगा। हॉलमार्क GitHub का एक 100% मुफ़्त, ओपन-सोर्स डिज़ाइन कौशल है जो AI कोडिंग सहायकों को वास्तविक, मानव-स्तरीय UI और UX मानक प्रदान करता है। हम हॉलमार्क को वैश्विक स्तर पर इंस्टॉल करने, 5-पैरामीटर वाले "$10,000 एजेंसी बिल्ड" प्रॉम्प्ट को शुरू से संरचित करने और अपने अंतर्निहित ऐप लॉजिक को बाधित किए बिना मौजूदा कोडबेस का ऑडिट और रीडिज़ाइन करने के बारे में जानेंगे। 🔗 लिंक और संसाधन 👉 हॉलमार्क का आधिकारिक GitHub रेपो: Nutlope/hallmark 👉 आधिकारिक वेबसाइट: usehallmark.com 👉 Node.js LTS डाउनलोड करें: nodejs.org ⚡ त्वरित टर्मिनल कमांड 1️⃣ Node और npm सत्यापित करें: node --version npm --version 2️⃣ हॉलमार्क को वैश्विक स्तर पर स्थापित करें: npx skills add nutlope/hallmark -g 3️⃣ किसी नए प्रोजेक्ट में हॉलमार्क को सक्रिय करें: • Claude Code / Cursor / OpenCode: /hallmark build a portfolio page for my AI services • Codex CLI: $hallmark build a portfolio page for my AI services 4️⃣ मौजूदा प्रोजेक्ट का ऑडिट और रीडिज़ाइन करें कोडबेस: • किसी विशिष्ट फ़ाइल का ऑडिट करें: /hallmark audit ./index.html • किसी संपूर्ण ऐप/फ़ोल्डर को रीडिज़ाइन करें: /hallmark redesign ./src/app 💡 5-पैरामीटर "$10K एजेंसी बिल्ड" प्रॉम्प्ट फ़ॉर्मूला अपने AI कोडिंग असिस्टेंट को केवल एक पंक्ति का प्रॉम्प्ट न दें। हॉलमार्क को ये 5 विशिष्ट विवरण प्रदान करें: 1. लक्षित दर्शक (उदाहरण के लिए, स्टार्टअप संस्थापक और सीटीओ) 2. पेशकश / परियोजना का प्रकार (उदाहरण के लिए, एआई स्वचालन और सॉफ्टवेयर इंजीनियरिंग एजेंसी पोर्टफोलियो) 3. ब्रांड रंग और टाइपोग्राफी (उदाहरण के लिए, डीप ऑब्सीडियन डार्क मोड, वार्म अलाबस्टर टेक्स्ट, एमराल्ड एक्सेंट, एडिटोरियल सेरिफ + मोनोस्पेस फॉन्ट पेयरिंग) 4. मुख्य सामग्री अनुभाग (उदाहरण के लिए, हीरो सेक्शन, इंटरैक्टिव केस स्टडी बेंटो ग्रिड, क्लाइंट मेट्रिक्स) 5. प्राथमिक कॉल-टू-एक्शन (उदाहरण के लिए, डिस्कवरी कॉल बुक करने के लिए हाई-कॉन्ट्रास्ट बटन) ⏱️ टाइमस्टैम्प / अध्याय 0:00 - "एआई स्लोप" समस्या (एआई वेबसाइटें क्लोन जैसी क्यों दिखती हैं) 0:24 - हॉलमार्क का परिचय (निःशुल्क ओपन-सोर्स गिटहब डिज़ाइन कौशल) 0:41 - हॉलमार्क कैसे काम करता है और समर्थित कोडिंग सहायक 1:23 - पूर्वापेक्षाएँ और वैश्विक सीएलआई इंस्टॉलेशन (npx कौशल जोड़ें) 2:00 - हॉलमार्क को कैसे ट्रिगर करें (/hallmark बनाम $hallmark) 2:17 - प्रो टिप: 5-पैरामीटर "$10,000 एजेंसी बिल्ड" प्रॉम्प्ट 3:02 - पहले और बाद के UI की तुलना 3:13 - मौजूदा कोडबेस वर्कफ़्लो 1: /hallmark ऑडिट 3:38 - मौजूदा कोडबेस वर्कफ़्लो 2: /hallmark रीडिज़ाइन 3:59 - व्यावहारिक वास्तविकताएं और स्कोप गार्डरेल्स 4:18 - 4-चरण प्री-लॉन्च QA चेकलिस्ट 4:36 - संपूर्ण सेटअप गाइड और निष्कर्ष 📲 हाउ हब से जुड़ें 🔔 YouTube पर सब्सक्राइब करें: youtube.com 📸 Instagram पर फॉलो करें: instagram.com 💬 क्या आपने अपने फ्रंट-एंड बिल्ड पर हॉलमार्क का परीक्षण किया है? मुझे कमेंट्स में बताएं कि यह आपके सामान्य कर्सर या क्लाउड कोड वर्कफ़्लो से कितना अलग है! #ClaudeCode #CursorAI #WebDevelopment #UIUXDesign #AICoding #FrontendDeveloper #GitHub #OpenCode #CodexCLI #HowHub [id] Cara Memaksa Claude Code & Cursor Mendesain Seperti Manusia (Skill GitHub Gratis) Anda dapat mengenali situs web yang dihasilkan AI dari jauh: gradien ungu yang membosankan, tipografi sans-serif generik, padding yang canggung, dan tanpa kepribadian visual sama sekali. Di komunitas pengembang, kami menyebutnya "AI slop." Dalam tutorial ini, saya akan menunjukkan kepada Anda cara memperbaiki UI yang dihasilkan AI secara permanen dalam waktu kurang dari 2 menit menggunakan Hallmark (nutlope/hallmark)—sebuah keterampilan desain GitHub sumber terbuka 100% gratis yang memberikan panduan UI dan UX berkualitas manusia kepada asisten pengkodean AI. Kita akan membahas cara menginstal Hallmark secara global, cara menyusun prompt "$10,000 Agency Build" dengan 5 parameter dari awal, dan cara mengaudit dan mendesain ulang basis kode yang ada tanpa merusak logika aplikasi Anda. 🔗 TAUTAN & SUMBER DAYA 👉 Repositori GitHub Resmi Hallmark: Nutlope/hallmark 👉 Situs Web Resmi: usehallmark.com 👉 Unduh Node.js LTS: nodejs.org ⚡ PERINTAH TERMINAL CEPAT 1️⃣ Verifikasi Node & npm: node --version npm --version 2️⃣ Instal Hallmark Secara Global: npx skills add nutlope/hallmark -g 3️⃣ Aktifkan Hallmark di Proyek Baru: • Claude Code / Cursor / OpenCode: /hallmark build a portfolio page for my AI services • Codex CLI: $hallmark build a portfolio page for my AI services 4️⃣ Audit & Desain Ulang Basis Kode yang Ada: • Audit file tertentu: /hallmark audit ./index.html • Mendesain ulang seluruh aplikasi/folder: /hallmark redesign ./src/app 💡 FORMULA PROMPT 5 PARAMETER "PEMBANGUNAN AGENSI $10K" Jangan hanya memberikan prompt satu baris kepada asisten pengkodean AI Anda. Berikan 5 detail spesifik berikut kepada Hallmark: 1. Target Audiens (misalnya, pendiri startup dan CTO) 2. Jenis Penawaran / Proyek (misalnya, portofolio agensi otomatisasi AI & rekayasa perangkat lunak) 3. Warna & Tipografi Merek (misalnya, mode gelap obsidian pekat, teks alabaster hangat, aksen zamrud, pasangan font serif editorial + monospace) 4. Bagian Konten Inti (misalnya, bagian Hero, grid bento studi kasus interaktif, metrik klien) 5. Ajakan Bertindak Utama (misalnya, tombol kontras tinggi untuk memesan panggilan penemuan) ⏱️ CAP WAKTU / BAB 0:00 - Masalah "AI yang Tidak Rapi" (Mengapa Situs Web AI Terlihat Seperti Kloning) 0:24 - Memperkenalkan Hallmark (Keterampilan Desain GitHub Sumber Terbuka Gratis) 0:41 - Cara Kerja Hallmark & Asisten Pengkodean yang Didukung 1:23 - Prasyarat & Instalasi CLI Global (npx) (tambahan keterampilan) 2:00 - Cara Memicu Hallmark (/hallmark vs $hallmark) 2:17 - Kiat Pro: Prompt "$10,000 Agency Build" dengan 5 Parameter 3:02 - Perbandingan UI Sebelum vs. Setelah 3:13 - Alur Kerja Basis Kode yang Ada 1: audit /hallmark 3:38 - Alur Kerja Basis Kode yang Ada 2: desain ulang /hallmark 3:59 - Realitas Praktis & Batasan Lingkup 4:18 - Daftar Periksa QA Pra-Peluncuran 4 Langkah 4:36 - Panduan Pengaturan Lengkap & Penutup 📲 TERHUBUNG DENGAN HOW HUB 🔔 Berlangganan di YouTube: youtube.com 📸 Ikuti di Instagram: instagram.com 💬 Sudah menguji Hallmark pada build front-end Anda? Beri tahu saya di kolom komentar bagaimana perbandingannya dengan alur kerja Cursor atau Claude Code Anda yang biasa! #ClaudeCode #CursorAI #WebDevelopment #UIUXDesign #AICoding #FrontendDeveloper #GitHub #OpenCode #CodexCLI #HowHub [it] Come costringere Claude Code e Cursor a progettare come un essere umano (Skill GitHub gratuita) Un sito web generato dall'IA si riconosce a colpo d'occhio: noiose sfumature viola, caratteri sans-serif generici, spaziatura goffa e totale assenza di personalità visiva. Nella comunità degli sviluppatori, questo viene definito "spazzatura da IA". In questo tutorial, ti mostrerò come correggere in modo permanente l'interfaccia utente generata dall'IA in meno di 2 minuti utilizzando Hallmark (nutlope/hallmark), una skill di design open source e completamente gratuita disponibile su GitHub che fornisce agli assistenti di programmazione basati sull'IA dei veri e propri parametri di riferimento per l'interfaccia utente e l'esperienza utente, di livello umano. Tratteremo l'installazione globale di Hallmark, la strutturazione da zero del prompt a 5 parametri "$10,000 Agency Build" e come analizzare e riprogettare un codice esistente senza compromettere la logica dell'applicazione. 🔗 LINK E RISORSE 👉 Repository GitHub ufficiale di Hallmark: Nutlope/hallmark 👉 Sito web ufficiale: usehallmark.com 👉 Scarica Node.js LTS: nodejs.org ⚡ COMANDI RAPIDI DA TERMINALE 1️⃣ Verifica Node e npm: node --version npm --version 2️⃣ Installa Hallmark a livello globale: npx skills add nutlope/hallmark -g 3️⃣ Avvia Hallmark in un nuovo progetto: • Claude Code / Cursor / OpenCode: /hallmark crea una pagina portfolio per i miei servizi di IA • Codex CLI: $hallmark crea una pagina portfolio per i miei servizi di IA 4️⃣ Verifica e riprogetta le codebase esistenti: • Verifica un file specifico: /hallmark audit ./index.html • Riprogetta un'intera app/cartella: /hallmark redesign ./src/app 💡 LA FORMULA A 5 PARAMETRI PER LA CREAZIONE DI UN'AGENZIA DA 10.000 DOLLARI Non limitarti a fornire al tuo assistente di programmazione AI un prompt di una sola riga. Fornisci a Hallmark questi 5 dettagli specifici: 1. Pubblico di riferimento (ad es. fondatori di startup e CTO) 2. Tipo di offerta/progetto (ad es. portfolio di un'agenzia di automazione AI e ingegneria del software) 3. Colori e tipografia del marchio (ad es. modalità scura ossidiana profonda, testo alabastro caldo, accenti smeraldo, abbinamento di font serif editoriali e monospazio) 4. Sezioni di contenuto principali (ad es. sezione Hero, griglia Bento interattiva per i casi di studio, metriche del cliente) 5. Invito all'azione principale (ad es. pulsante ad alto contrasto per prenotare una chiamata conoscitiva) ⏱️ INDICE DEI CONTENUTI / CAPITOLI 0:00 - Il problema della "scarsa qualità dell'AI" (perché i siti web basati sull'IA sembrano cloni) 0:24 - Presentazione di Hallmark (competenza di progettazione open source gratuita di GitHub) 0:41 - Come funziona Hallmark e assistenti di programmazione supportati 1:23 - Prerequisiti e funzionalità globali Installazione CLI (npx skills add) 2:00 - Come attivare Hallmark (/hallmark vs $hallmark) 2:17 - Suggerimento Pro: il prompt "Build Agenzia da $10.000" a 5 parametri 3:02 - Confronto interfaccia utente prima e dopo 3:13 - Flusso di lavoro codebase esistenti 1: audit /hallmark 3:38 - Flusso di lavoro codebase esistenti 2: riprogettazione /hallmark 3:59 - Aspetti pratici e limiti di ambito 4:18 - Checklist QA pre-lancio in 4 fasi 4:36 - Guida completa alla configurazione e conclusione 📲 CONNETTITI CON HOW HUB 🔔 Iscriviti su YouTube: youtube.com 📸 Seguici su Instagram: instagram.com 💬 Hai testato Hallmark sulla tua build front-end? Fatemi sapere nei commenti come si confronta con il vostro solito flusso di lavoro con Cursor o Claude Code! #ClaudeCode #CursorAI #WebDevelopment #UIUXDesign #AICoding #FrontendDeveloper #GitHub #OpenCode #CodexCLI #HowHub [iw] איך להכריח את Claude Code ו-Cursor לעצב כמו בני אדם (כלי GitHub חינמי) אפשר לזהות אתר אינטרנט שנוצר על ידי בינה מלאכותית ממרחק של קילומטרים: גרדיאנטים סגולים משעממים, טיפוגרפיה גנרית ללא סריף, ריפוד מביך ואפס אישיות ויזואלית. בקהילת המפתחים, אנחנו קוראים לזה "שפשופי בינה מלאכותית". במדריך זה, אראה לכם כיצד לתקן לצמיתות ממשק משתמש שנוצר על ידי בינה מלאכותית בפחות משתי דקות באמצעות Hallmark (nutlope/hallmark) - מיומנות עיצוב חינמית לחלוטין בקוד פתוח ב-GitHub, המעניקה לעוזרי קידוד בינה מלאכותית מעקות בטיחות אמיתיים ברמת אנושית עבור ממשק משתמש וחוויית משתמש. נסקור כיצד להתקין את Hallmark באופן גלובלי, כיצד לבנות את ההנחיה "$10,000 Agency Build" בת 5 הפרמטרים מאפס, וכיצד לבצע ביקורת ולעצב מחדש בסיס קוד קיים מבלי לשבור את הלוגיקה הבסיסית של האפליקציה. 🔗 קישורים ומשאבים 👉 מאגר GitHub רשמי של Hallmark: Nutlope/hallmark 👉 אתר רשמי: usehallmark.com 👉 הורד Node.js LTS: nodejs.org ⚡ פקודות טרמינל מהירות 1️⃣ אימות Node & npm: node --version npm --version 2️⃣ התקנת Hallmark באופן גלובלי: npx skills add nutlope/hallmark -g 3️⃣ הפעלת Hallmark בפרויקט חדש: • Claude Code / Cursor / OpenCode: /hallmark בנה דף תיק עבודות עבור שירותי הבינה המלאכותית שלי • Codex CLI: $hallmark בנה דף תיק עבודות עבור שירותי הבינה המלאכותית שלי 4️⃣ ביקורת ועיצוב מחדש של בסיסי קוד קיימים: • ביקורת קובץ ספציפי: /hallmark audit ./index.html • עיצוב מחדש של אפליקציה/תיקייה שלמה: /hallmark redesign ./src/app 💡 נוסחת ההנחיה "בניית סוכנות בשווי 10,000 דולר" בת 5 פרמטרים אל תתנו לעוזר קידוד הבינה המלאכותית שלכם רק שורה אחת. הזינו את 5 הפרטים הספציפיים הבאים ב- Hallmark: 1. קהל יעד (למשל, מייסדי סטארט-אפים ומנהלי טכנולוגיות ראשיות) 2. סוג הצעה / פרויקט (למשל, תיק עבודות סוכנויות אוטומציה של בינה מלאכותית והנדסת תוכנה) 3. צבעי מותג וטיפוגרפיה (למשל, מצב כהה בגוון אובסידיאן עמוק, טקסט אלבסטר חם, הדגשות אזמרגד, זיווג גופנים של סריף עריכה + מרחב מונו) 4. מדורי תוכן מרכזיים (למשל, מדור גיבור, רשת בנטו של מקרי בוחן אינטראקטיביים, מדדי לקוח) 5. קריאה לפעולה ראשית (למשל, כפתור ניגודיות גבוהה להזמנת שיחת גילוי) ⏱️ חותמות זמן / פרקים 0:00 - בעיית "השפשופי הבינה המלאכותית" (מדוע אתרי אינטרנט של בינה מלאכותית נראים כמו שיבוטים) 0:24 - הצגת Hallmark (מיומנות עיצוב חינמית בקוד פתוח של GitHub) 0:41 - כיצד Hallmark עובד ועוזרי קידוד נתמכים 1:23 - דרישות קדם והתקנת ממשק שורת פקודה גלובלי (תוספת מיומנויות npx) 2:00 - כיצד להפעיל Hallmark (/hallmark לעומת $hallmark) 2:17 - טיפ מקצועי: הנחיית "בניית סוכנות ב-$10,000" בת 5 פרמטרים 3:02 - השוואת ממשק משתמש לפני לעומת אחרי 3:13 - זרימת עבודה 1 של בסיסי קוד קיימים: ביקורת /hallmark 3:38 - זרימת עבודה 2 של בסיסי קוד קיימים: עיצוב מחדש של /hallmark 3:59 - מציאות מעשית ומעקות בטיחות בהיקף 4:18 - רשימת בדיקה של QA לפני השקה בת 4 שלבים 4:36 - מדריך התקנה מלא וסיום 📲 התחברו עם HOW HUB 🔔 הירשמו ביוטיוב: youtube.com 📸 עקבו באינסטגרם: instagram.com 💬 בדקתם את Hallmark בבניית הקצה שלכם? ספרו לי בתגובות איך זה משתווה לזרימת העבודה הרגילה שלכם עם Cursor או Claude Code! #ClaudeCode #CursorAI #WebDevelopment #UIUXDesign #AICoding #FrontendDeveloper #GitHub #OpenCode #CodexCLI #HowHub [ja] Claude CodeとCursorに人間らしいデザインをさせる方法(無料のGitHubスキル) AIが生成したウェブサイトは、遠くからでもすぐにわかります。退屈な紫色のグラデーション、ありきたりなサンセリフ体、不自然なパディング、そして視覚的な個性の皆無。開発者コミュニティでは、これを「AIスロップ」と呼んでいます。 このチュートリアルでは、Hallmark(nutlope/hallmark)を使って、AI生成UIを2分以内に恒久的に修正する方法をご紹介します。Hallmarkは、AIコーディングアシスタントに人間レベルのUI/UXガイドラインを提供する、100%無料のオープンソースGitHubデザインスキルです。 Hallmarkをグローバルにインストールする方法、5つのパラメータを持つ「$10,000 Agency Build」プロンプトをゼロから構築する方法、そして既存のコードベースを基盤となるアプリロジックを損なうことなく監査および再設計する方法を解説します。 🔗 リンクとリソース 👉 Hallmark公式GitHubリポジトリ:Nutlope/hallmark 👉 公式ウェブサイト:usehallmark.com 👉 Node.js LTSのダウンロード:nodejs.org ⚡ クイックターミナルコマンド 1️⃣ Nodeとnpmの確認: node --version npm --version 2️⃣ Hallmarkのグローバルインストール: npx skills add nutlope/hallmark -g 3️⃣ 新規プロジェクトでのHallmarkの起動: • Claude Code / Cursor / OpenCode:/hallmark build a portfolio page for my AI services • Codex CLI:$hallmark build a portfolio page for my AI services 4️⃣ 既存コードベースの監査と再設計: • 特定のファイルの監査:/hallmark audit ./index.html • 既存コードベースの再設計アプリ全体/フォルダ: /hallmark redesign ./src/app 💡 5つのパラメータで構成された「1万ドル規模の代理店開発」プロンプトフォーミュラ AIコーディングアシスタントに、たった1行のプロンプトを与えるだけでは不十分です。 Hallmarkに以下の5つの詳細情報を入力してください。 1. ターゲットオーディエンス(例:スタートアップ創業者、CTO) 2. 提供サービス/プロジェクトの種類(例:AI自動化およびソフトウェアエンジニアリングエージェンシーのポートフォリオ) 3. ブランドカラーとタイポグラフィ(例:ディープオブシディアンのダークモード、温かみのあるアラバスターのテキスト、エメラルドのアクセント、エディトリアルセリフと等幅フォントの組み合わせ) 4. 主要コンテンツセクション(例:ヒーローセクション、インタラクティブなケーススタディのBentoグリッド、クライアント指標) 5. 主要なコールトゥアクション(例:ディスカバリーコール予約用の高コントラストボタン) ⏱️ タイムスタンプ/チャプター 0:00 - 「AIの粗雑さ」問題(AIウェブサイトがクローンのように見える理由) 0:24 - Hallmarkの紹介(無料のオープンソースGitHubデザインスキル) 0:41 - Hallmarkの仕組みとサポートされているコーディングアシスタント 1:23 - 前提条件とグローバルCLIのインストール(npx)スキル追加) 2:00 - Hallmarkの起動方法(/hallmark vs $hallmark) 2:17 - プロのヒント:5つのパラメータ「$10,000エージェンシービルド」プロンプト 3:02 - 変更前と変更後のUI比較 3:13 - 既存コードベースのワークフロー1:/hallmark audit 3:38 - 既存コードベースのワークフロー2:/hallmark redesign 3:59 - 実践的な課題とスコープのガードレール 4:18 - 4ステップのローンチ前QAチェックリスト 4:36 - 完全セットアップガイドとエンディング 📲 HOW HUBとつながろう 🔔 YouTubeチャンネル登録:youtube.com 📸 Instagramフォロー:instagram.com 💬 フロントエンドビルドでHallmarkをテストしましたか?普段お使いのCursorやClaude Codeのワークフローと比べてどうだったか、ぜひコメントで教えてください! #ClaudeCode #CursorAI #WebDevelopment #UIUXDesign #AICoding #FrontendDeveloper #GitHub #OpenCode #CodexCLI #HowHub [ko] Claude Code와 Cursor가 사람처럼 디자인하게 만드는 법 (무료 GitHub 기술) AI가 생성한 웹사이트는 멀리서도 쉽게 알아볼 수 있습니다. 밋밋한 보라색 그라데이션, 평범한 산세리프 서체, 어색한 여백, 그리고 시각적 개성이라고는 찾아볼 수 없죠. 개발자 커뮤니티에서는 이런 웹사이트를 "AI 슬롭(AI slop)"이라고 부릅니다. 이 튜토리얼에서는 AI 코딩 도우미에게 실제 사람 수준의 UI 및 UX 가이드라인을 제공하는 100% 무료 오픈 소스 GitHub 디자인 스킬인 Hallmark(nutlope/hallmark)를 사용하여 2분 안에 AI가 생성한 UI를 영구적으로 개선하는 방법을 보여드리겠습니다. Hallmark를 전역적으로 설치하는 방법, 5개 매개변수로 구성된 "$10,000 Agency Build" 프롬프트를 처음부터 구성하는 방법, 그리고 앱의 기본 로직을 손상시키지 않고 기존 코드베이스를 검토하고 재설계하는 방법을 다룹니다. 🔗 링크 및 리소스 👉 Hallmark 공식 GitHub 저장소: Nutlope/hallmark 👉 공식 웹사이트: usehallmark.com 👉 Node.js LTS 다운로드: nodejs.org ⚡ 빠른 터미널 명령어 1️⃣ Node 및 npm 버전 확인: node --version npm --version 2️⃣ Hallmark 전역 설치: npx skills add nutlope/hallmark -g 3️⃣ 새 프로젝트에서 Hallmark 실행: • Claude Code / Cursor / OpenCode: /hallmark build a portfolio page for my AI services • Codex CLI: $hallmark build a portfolio page for my AI services 4️⃣ 기존 코드베이스 감사 및 재설계: • 특정 파일 감사: /hallmark audit ./index.html • 전체 앱/폴더 재설계: /hallmark redesign ./src/app 💡 THE 5개 매개변수를 사용한 "$10K 에이전시 구축" 프롬프트 공식 AI 코딩 도우미에게 한 줄짜리 프롬프트만 주지 마세요. Hallmark에 다음 5가지 세부 정보를 제공하세요. 1. 타겟 고객 (예: 스타트업 창업자 및 CTO) 2. 제공 서비스/프로젝트 유형 (예: AI 자동화 및 소프트웨어 엔지니어링 에이전시 포트폴리오) 3. 브랜드 색상 및 타이포그래피 (예: 짙은 흑요석색 다크 모드, 따뜻한 알라바스터색 텍스트, 에메랄드색 포인트, 에디터 세리프 + 모노스페이스 폰트 조합) 4. 핵심 콘텐츠 (예: 히어로 섹션, 인터랙티브 사례 연구 벤토 그리드, 고객 지표) 5. 주요 행동 유도 버튼 (예: 상담 예약용 고대비 버튼) ⏱️ 타임스탬프/목차 0:00 - "AI 슬롭" 문제 (AI 웹사이트가 복제품처럼 보이는 이유) 0:24 - Hallmark 소개 (무료 오픈 소스 GitHub 디자인 스킬) 0:41 - Hallmark 작동 방식 및 지원되는 코딩 도우미 1:23 - 필수 조건 및 전역 CLI 설치 (npx 스킬 추가) 2:00 - Hallmark 실행 방법 (/hallmark vs $hallmark) 2:17 - 프로 팁: 5개 매개변수 "$10,000 에이전시 빌드" 프롬프트 3:02 - UI 변경 전후 비교 3:13 - 기존 코드베이스 워크플로 1: /hallmark audit 3:38 - 기존 코드베이스 워크플로 2: /hallmark redesign 3:59 - 실제적인 고려 사항 및 범위 가이드라인 4:18 - 4단계 사전 출시 QA 체크리스트 4:36 - 전체 설정 가이드 및 마무리 📲 HOW HUB와 연결하기 🔔 YouTube 구독: youtube.com 📸 Instagram 팔로우: instagram.com 💬 프런트엔드 빌드에서 Hallmark를 테스트해 보셨나요? 평소에 사용하시던 Cursor나 Claude Code 워크플로우와 어떻게 다른지 댓글로 알려주세요! #ClaudeCode #CursorAI #WebDevelopment #UIUXDesign #AICoding #FrontendDeveloper #GitHub #OpenCode #CodexCLI #HowHub [ml] Claude Code, Cursor എന്നിവയെ മനുഷ്യരെപ്പോലെ ഡിസൈൻ ചെയ്യാൻ നിർബന്ധിക്കുന്നത് എങ്ങനെ (സൗജന്യ GitHub... ഒരു മൈൽ അകലെ നിന്ന് നിങ്ങൾക്ക് AI- ജനറേറ്റഡ് വെബ്സൈറ്റ് കണ്ടെത്താൻ കഴിയും: ബോറടിപ്പിക്കുന്ന പർപ്പിൾ ഗ്രേഡിയന്റുകൾ, ജനറിക് സാൻസ്-സെരിഫ് ടൈപ്പോഗ്രാഫി, അക്വാർഡ് പാഡിംഗ്, സീറോ വിഷ്വൽ പേഴ്സണാലിറ്റി. ഡെവലപ്പർ കമ്മ്യൂണിറ്റിയിൽ, ഞങ്ങൾ ഇതിനെ "AI സ്ലോപ്പ്" എന്ന് വിളിക്കുന്നു. ഈ ട്യൂട്ടോറിയലിൽ, ഹാൾമാർക്ക് (നട്ട്ലോപ്പ്/ഹാൾമാർക്ക്) ഉപയോഗിച്ച് 2 മിനിറ്റിനുള്ളിൽ AI- ജനറേറ്റഡ് UI എങ്ങനെ ശാശ്വതമായി പരിഹരിക്കാമെന്ന് ഞാൻ നിങ്ങൾക്ക് കാണിച്ചുതരാം - AI കോഡിംഗ് അസിസ്റ്റന്റുമാർക്ക് യഥാർത്ഥ, മനുഷ്യ-ഗ്രേഡ് UI, UX ഗാർഡ്റെയിലുകൾ നൽകുന്ന 100% സൗജന്യ, ഓപ്പൺ സോഴ്സ് GitHub ഡിസൈൻ വൈദഗ്ദ്ധ്യം. ആഗോളതലത്തിൽ ഹാൾമാർക്ക് എങ്ങനെ ഇൻസ്റ്റാൾ ചെയ്യാം, 5-പാരാമീറ്റർ "$10,000 ഏജൻസി ബിൽഡ്" പ്രോംപ്റ്റ് ആദ്യം മുതൽ എങ്ങനെ ഘടനാപരമാക്കാം, നിങ്ങളുടെ അടിസ്ഥാന ആപ്പ് ലോജിക്ക് തകർക്കാതെ നിലവിലുള്ള ഒരു കോഡ്ബേസ് എങ്ങനെ ഓഡിറ്റ് ചെയ്ത് പുനർരൂപകൽപ്പന ചെയ്യാം എന്നിവ ഞങ്ങൾ കവർ ചെയ്യും. 🔗 ലിങ്കുകളും റിസോഴ്സുകളും 👉 ഔദ്യോഗിക ഹാൾമാർക്ക് GitHub Repo: Nutlope/hallmark 👉 ഔദ്യോഗിക വെബ്സൈറ്റ്: usehallmark.com 👉 Node.js LTS ഡൗൺലോഡ് ചെയ്യുക: nodejs.org ⚡ ക്വിക്ക് ടെർമിനൽ കമാൻഡുകൾ 1️⃣ നോഡ് & npm പരിശോധിക്കുക: node --version npm --version 2️⃣ ആഗോളതലത്തിൽ ഹാൾമാർക്ക് ഇൻസ്റ്റാൾ ചെയ്യുക: npx കഴിവുകൾ nutlope/hallmark -g ചേർക്കുക 3️⃣ ഒരു പുതിയ പ്രോജക്റ്റിൽ ഹാൾമാർക്ക് ട്രിഗർ ചെയ്യുക: • ക്ലോഡ് കോഡ് / കഴ്സർ / ഓപ്പൺകോഡ്: /hallmark എന്റെ AI സേവനങ്ങൾക്കായി ഒരു പോർട്ട്ഫോളിയോ പേജ് നിർമ്മിക്കുക • കോഡെക്സ് CLI: $hallmark എന്റെ AI സേവനങ്ങൾക്കായി ഒരു പോർട്ട്ഫോളിയോ പേജ് നിർമ്മിക്കുക 4️⃣ നിലവിലുള്ള കോഡ്ബേസുകൾ ഓഡിറ്റ് ചെയ്യുകയും പുനർരൂപകൽപ്പന ചെയ്യുകയും ചെയ്യുക: • ഒരു നിർദ്ദിഷ്ട ഫയൽ ഓഡിറ്റ് ചെയ്യുക: /hallmark audit ./index.html • ഒരു മുഴുവൻ ആപ്പ്/ഫോൾഡർ പുനർരൂപകൽപ്പന ചെയ്യുക: /hallmark redesign ./src/app 💡 5-പാരാമീറ്റർ "$10K ഏജൻസി ബിൽഡ്" പ്രോംപ്റ്റ് ഫോർമുല നിങ്ങളുടെ AI കോഡിംഗ് അസിസ്റ്റന്റിന് ഒരു വരി പ്രോംപ്റ്റ് മാത്രം നൽകരുത്. ഈ 5 പ്രത്യേക വിശദാംശങ്ങൾ ഫീഡ് ഹാൾമാർക്ക് ചെയ്യുക: 1. ടാർഗെറ്റ് പ്രേക്ഷകർ (ഉദാ. സ്റ്റാർട്ടപ്പ് സ്ഥാപകരും CTO-കളും) 2. ഓഫറിംഗ് / പ്രോജക്റ്റ് തരം (ഉദാ. AI ഓട്ടോമേഷൻ & സോഫ്റ്റ്വെയർ എഞ്ചിനീയറിംഗ് ഏജൻസി പോർട്ട്ഫോളിയോ) 3. ബ്രാൻഡ് നിറങ്ങളും ടൈപ്പോഗ്രാഫിയും (ഉദാ. ഡീപ് ഒബ്സിഡിയൻ ഡാർക്ക് മോഡ്, വാം അലബാസ്റ്റർ ടെക്സ്റ്റ്, എമറാൾഡ് ആക്സന്റുകൾ, എഡിറ്റോറിയൽ സെരിഫ് + മോണോസ്പേസ് ഫോണ്ട് ജോടിയാക്കൽ) 4. കോർ കണ്ടന്റ് സെക്ഷനുകൾ (ഉദാ. ഹീറോ വിഭാഗം, ഇന്ററാക്ടീവ് കേസ് സ്റ്റഡീസ് ബെന്റോ ഗ്രിഡ്, ക്ലയന്റ് മെട്രിക്സ്) 5. പ്രാഥമിക കോൾ-ടു-ആക്ഷൻ (ഉദാ. ഒരു ഡിസ്കവറി കോൾ ബുക്ക് ചെയ്യുന്നതിനുള്ള ഉയർന്ന-കോൺട്രാസ്റ്റ് ബട്ടൺ) ⏱️ TIMESTAMPS / അധ്യായങ്ങൾ 0:00 - "AI സ്ലോപ്പ്" പ്രശ്നം (AI വെബ്സൈറ്റുകൾ ക്ലോണുകൾ പോലെ കാണപ്പെടുന്നത് എന്തുകൊണ്ട്) 0:24 - ഹാൾമാർക്ക് അവതരിപ്പിക്കുന്നു (സൗജന്യ ഓപ്പൺ-സോഴ്സ് GitHub ഡിസൈൻ സ്കിൽ) 0:41 - ഹാൾമാർക്ക് എങ്ങനെ പ്രവർത്തിക്കുന്നു & പിന്തുണയ്ക്കുന്ന കോഡിംഗ് അസിസ്റ്റന്റുമാർ 1:23 - മുൻവ്യവസ്ഥകളും ആഗോള CLI ഇൻസ്റ്റാളേഷനും (npx കഴിവുകൾ) add) 2:00 - ഹാൾമാർക്ക് എങ്ങനെ ട്രിഗർ ചെയ്യാം (/hallmark vs $hallmark) 2:17 - പ്രൊഫഷണൽ നുറുങ്ങ്: 5-പാരാമീറ്റർ "$10,000 ഏജൻസി ബിൽഡ്" പ്രോംപ്റ്റ് 3:02 - UI താരതമ്യം ചെയ്യുന്നതിന് മുമ്പും ശേഷവും 3:13 - നിലവിലുള്ള കോഡ്ബേസുകളുടെ വർക്ക്ഫ്ലോ 1: /hallmark ഓഡിറ്റ് 3:38 - നിലവിലുള്ള കോഡ്ബേസുകളുടെ വർക്ക്ഫ്ലോ 2: /hallmark പുനർരൂപകൽപ്പന 3:59 - പ്രായോഗിക യാഥാർത്ഥ്യങ്ങളും സ്കോപ്പ് ഗാർഡ്റെയിലുകളും 4:18 - 4-ഘട്ട പ്രീ-ലോഞ്ച് QA ചെക്ക്ലിസ്റ്റ് 4:36 - പൂർണ്ണ സജ്ജീകരണ ഗൈഡും ഔട്ട്റോയും 📲 ഹൗ ഹബുമായി ബന്ധപ്പെടുക 🔔 YouTube-ൽ സബ്സ്ക്രൈബുചെയ്യുക: youtube.com 📸 ഇൻസ്റ്റാഗ്രാമിൽ പിന്തുടരുക: instagram.com 💬 നിങ്ങളുടെ ഫ്രണ്ട്-എൻഡ് ബിൽഡിൽ ഹാൾമാർക്ക് പരീക്ഷിച്ചോ? നിങ്ങളുടെ പതിവ് കഴ്സർ അല്ലെങ്കിൽ ക്ലോഡ് കോഡ് വർക്ക്ഫ്ലോയുമായി ഇത് എങ്ങനെ താരതമ്യം ചെയ്യുന്നുവെന്ന് അഭിപ്രായങ്ങളിൽ എന്നെ അറിയിക്കൂ! #ClaudeCode #CursorAI #WebDevelopment #UIUXDesign #AICoding #FrontendDeveloper #GitHub #OpenCode #CodexCLI #HowHub [nl-NL] Zo dwing je Claude Code & Cursor om te ontwerpen als een mens (Gratis GitHub-skill) Je herkent een door AI gegenereerde website van verre: saaie paarse kleurovergangen, generieke schreefloze typografie, onhandige opvulling en geen enkele visuele persoonlijkheid. In de ontwikkelaarswereld noemen we dit "AI-prut". In deze tutorial laat ik je zien hoe je AI-gegenereerde UI permanent kunt verbeteren in minder dan 2 minuten met Hallmark (nutlope/hallmark)—een 100% gratis, open-source GitHub-ontwerptool die AI-codeerassistenten echte, mensvriendelijke UI- en UX-richtlijnen biedt. We behandelen hoe je Hallmark globaal installeert, hoe je de prompt "$10,000 Agency Build" met 5 parameters helemaal opnieuw structureert en hoe je een bestaande codebase controleert en herontwerpt zonder de onderliggende applicatielogica te beschadigen. 🔗 LINKS & BRONNEN 👉 Officiële Hallmark GitHub-repository: Nutlope/hallmark 👉 Officiële website: usehallmark.com 👉 Node.js LTS downloaden: nodejs.org ⚡ SNELLE TERMINALCOMMANDO'S 1️⃣ Node & npm controleren: node --version npm --version 2️⃣ Hallmark globaal installeren: npx skills add nutlope/hallmark -g 3️⃣ Hallmark activeren in een nieuw project: • Claude Code / Cursor / OpenCode: /hallmark build a portfolio page for my AI services • Codex CLI: $hallmark build a portfolio page for my AI services 4️⃣ Bestaande codebases controleren en herontwerpen: • Een specifiek bestand controleren: /hallmark audit ./index.html • Een complete app/map opnieuw ontwerpen: /hallmark redesign ./src/app 💡 DE FORMULE VOOR EEN "BUREAU VAN $10.000" MET 5 PARAMETERS Geef je AI-codeerassistent niet slechts één regel als prompt. Geef Hallmark deze 5 specifieke details: 1. Doelgroep (bijv. oprichters en CTO's van startups) 2. Aanbod / Projecttype (bijv. portfolio van een bureau voor AI-automatisering en software-engineering) 3. Merkkleuren en typografie (bijv. donker donkerblauw, warme albasten tekst, smaragdgroene accenten, combinatie van een redactionele schreefletter en een monospace lettertype) 4. Kerninhoud (bijv. hero-sectie, interactieve casestudy-bento-grid, klantstatistieken) 5. Primaire call-to-action (bijv. contrastrijke knop om een kennismakingsgesprek in te plannen) ⏱️ TIJDSTEMPELS / HOOFDSTUKKEN 0:00 - Het "AI-probleem" (Waarom AI-websites op klonen lijken) 0:24 - Introductie van Hallmark (Gratis open-source GitHub-ontwerpskill) 0:41 - Hoe Hallmark werkt en ondersteunde codeerassistenten 1:23 - Vereisten & Globale CLI-installatie (npx-vaardigheden toegevoegd) 2:00 - Hoe Hallmark te activeren (/hallmark vs $hallmark) 2:17 - Pro-tip: De prompt "$10.000 Agency Build" met 5 parameters 3:02 - UI-vergelijking voor en na 3:13 - Workflow voor bestaande codebases 1: /hallmark-audit 3:38 - Workflow voor bestaande codebases 2: /hallmark-herontwerp 3:59 - Praktische realiteit en scope-richtlijnen 4:18 - 4-stappen QA-checklist voor de lancering 4:36 - Complete installatiehandleiding en outro 📲 CONNECT MET HOW HUB 🔔 Abonneer je op YouTube: youtube.com 📸 Volg ons op Instagram: instagram.com 💬 Hallmark getest op je front-end build? Laat me in de reacties weten hoe dit zich verhoudt tot je gebruikelijke Cursor- of Claude Code-workflow! #ClaudeCode #CursorAI #WebDevelopment #UIUXDesign #AICoding #FrontendDeveloper #GitHub #OpenCode #CodexCLI #HowHub [pa] Claude Code ਅਤੇ Cursor ਨੂੰ ਇਨਸਾਨਾਂ ਵਾਂਗ ਡਿਜ਼ਾਈਨ ਕਰਨ ਲਈ ਮਜਬੂਰ ਕਿਵੇਂ ਕਰੀਏ (ਮੁਫਤ GitHub ਸਕਿੱਲ) ਤੁਸੀਂ ਇੱਕ ਮੀਲ ਦੂਰ ਤੋਂ ਇੱਕ AI-ਤਿਆਰ ਕੀਤੀ ਵੈੱਬਸਾਈਟ ਦੇਖ ਸਕਦੇ ਹੋ: ਬੋਰਿੰਗ ਜਾਮਨੀ ਗਰੇਡੀਐਂਟ, ਆਮ ਸੈਨਸ-ਸੇਰੀਫ ਟਾਈਪੋਗ੍ਰਾਫੀ, ਅਜੀਬ ਪੈਡਿੰਗ, ਅਤੇ ਜ਼ੀਰੋ ਵਿਜ਼ੂਅਲ ਸ਼ਖਸੀਅਤ। ਡਿਵੈਲਪਰ ਕਮਿਊਨਿਟੀ ਵਿੱਚ, ਅਸੀਂ ਇਸਨੂੰ "AI ਸਲੋਪ" ਕਹਿੰਦੇ ਹਾਂ। ਇਸ ਟਿਊਟੋਰਿਅਲ ਵਿੱਚ, ਮੈਂ ਤੁਹਾਨੂੰ ਦਿਖਾਵਾਂਗਾ ਕਿ ਹਾਲਮਾਰਕ (ਨਟਲੋਪ/ਹਾਲਮਾਰਕ) ਦੀ ਵਰਤੋਂ ਕਰਕੇ 2 ਮਿੰਟਾਂ ਤੋਂ ਘੱਟ ਸਮੇਂ ਵਿੱਚ AI-ਤਿਆਰ ਕੀਤੀ UI ਨੂੰ ਸਥਾਈ ਤੌਰ 'ਤੇ ਕਿਵੇਂ ਠੀਕ ਕਰਨਾ ਹੈ—ਇੱਕ 100% ਮੁਫ਼ਤ, ਓਪਨ-ਸੋਰਸ GitHub ਡਿਜ਼ਾਈਨ ਹੁਨਰ ਜੋ AI ਕੋਡਿੰਗ ਸਹਾਇਕਾਂ ਨੂੰ ਅਸਲ, ਮਨੁੱਖੀ-ਗ੍ਰੇਡ UI ਅਤੇ UX ਗਾਰਡਰੇਲ ਦਿੰਦਾ ਹੈ। ਅਸੀਂ ਦੱਸਾਂਗੇ ਕਿ ਗਲੋਬਲ ਪੱਧਰ 'ਤੇ ਹਾਲਮਾਰਕ ਨੂੰ ਕਿਵੇਂ ਸਥਾਪਿਤ ਕਰਨਾ ਹੈ, 5-ਪੈਰਾਮੀਟਰ "$10,000 ਏਜੰਸੀ ਬਿਲਡ" ਪ੍ਰੋਂਪਟ ਨੂੰ ਸ਼ੁਰੂ ਤੋਂ ਕਿਵੇਂ ਢਾਂਚਾ ਬਣਾਉਣਾ ਹੈ, ਅਤੇ ਤੁਹਾਡੇ ਅੰਡਰਲਾਈੰਗ ਐਪ ਲਾਜਿਕ ਨੂੰ ਤੋੜੇ ਬਿਨਾਂ ਇੱਕ ਮੌਜੂਦਾ ਕੋਡਬੇਸ ਦਾ ਆਡਿਟ ਅਤੇ ਰੀਡਿਜ਼ਾਈਨ ਕਿਵੇਂ ਕਰਨਾ ਹੈ। 🔗 ਲਿੰਕ ਅਤੇ ਸਰੋਤ 👉 ਅਧਿਕਾਰਤ ਹਾਲਮਾਰਕ GitHub ਰੈਪੋ: Nutlope/hallmark 👉 ਅਧਿਕਾਰਤ ਵੈੱਬਸਾਈਟ: usehallmark.com 👉 Node.js ਡਾਊਨਲੋਡ ਕਰੋ LTS: nodejs.org ⚡ ਤੇਜ਼ ਟਰਮੀਨਲ ਕਮਾਂਡਾਂ 1️⃣ ਨੋਡ ਅਤੇ npm ਦੀ ਪੁਸ਼ਟੀ ਕਰੋ: node --version npm --version 2️⃣ ਗਲੋਬਲੀ ਹਾਲਮਾਰਕ ਸਥਾਪਿਤ ਕਰੋ: npx ਹੁਨਰ nutlope/hallmark -g ਸ਼ਾਮਲ ਕਰੋ 3️⃣ ਇੱਕ ਨਵੇਂ ਪ੍ਰੋਜੈਕਟ ਵਿੱਚ ਹਾਲਮਾਰਕ ਨੂੰ ਟਰਿੱਗਰ ਕਰੋ: • ਕਲਾਉਡ ਕੋਡ / ਕਰਸਰ / ਓਪਨਕੋਡ: /hallmark ਮੇਰੀਆਂ AI ਸੇਵਾਵਾਂ ਲਈ ਇੱਕ ਪੋਰਟਫੋਲੀਓ ਪੰਨਾ ਬਣਾਓ • ਕੋਡੈਕਸ CLI: $hallmark ਮੇਰੀਆਂ AI ਸੇਵਾਵਾਂ ਲਈ ਇੱਕ ਪੋਰਟਫੋਲੀਓ ਪੰਨਾ ਬਣਾਓ 4️⃣ ਮੌਜੂਦਾ ਕੋਡਬੇਸਾਂ ਦਾ ਆਡਿਟ ਅਤੇ ਮੁੜ ਡਿਜ਼ਾਈਨ ਕਰੋ: • ਇੱਕ ਖਾਸ ਫਾਈਲ ਦਾ ਆਡਿਟ ਕਰੋ: /hallmark audit ./index.html • ਇੱਕ ਪੂਰਾ ਐਪ/ਫੋਲਡਰ ਦੁਬਾਰਾ ਡਿਜ਼ਾਈਨ ਕਰੋ: /hallmark ਰੀਡਿਜ਼ਾਈਨ ਕਰੋ ./src/app 💡 5-ਪੈਰਾਮੀਟਰ "$10K ਏਜੰਸੀ ਬਿਲਡ" ਪ੍ਰੋਂਪਟ ਫਾਰਮੂਲਾ ਆਪਣੇ AI ਕੋਡਿੰਗ ਸਹਾਇਕ ਨੂੰ ਸਿਰਫ਼ ਇੱਕ-ਲਾਈਨ ਪ੍ਰੋਂਪਟ ਨਾ ਦਿਓ। ਇਹਨਾਂ 5 ਖਾਸ ਵੇਰਵਿਆਂ ਨੂੰ ਹਾਲਮਾਰਕ ਕਰੋ: 1. ਟਾਰਗੇਟ ਦਰਸ਼ਕ (ਜਿਵੇਂ ਕਿ, ਸਟਾਰਟਅੱਪ ਸੰਸਥਾਪਕ ਅਤੇ CTO) 2. ਪੇਸ਼ਕਸ਼ / ਪ੍ਰੋਜੈਕਟ ਕਿਸਮ (ਜਿਵੇਂ ਕਿ, AI ਆਟੋਮੇਸ਼ਨ ਅਤੇ ਸਾਫਟਵੇਅਰ ਇੰਜੀਨੀਅਰਿੰਗ ਏਜੰਸੀ ਪੋਰਟਫੋਲੀਓ) 3. ਬ੍ਰਾਂਡ ਰੰਗ ਅਤੇ ਟਾਈਪੋਗ੍ਰਾਫੀ (ਜਿਵੇਂ ਕਿ, ਡੀਪ ਓਬਸੀਡੀਅਨ ਡਾਰਕ ਮੋਡ, ਗਰਮ ਅਲਾਬੈਸਟਰ ਟੈਕਸਟ, ਐਮਰਾਲਡ ਐਕਸੈਂਟਸ, ਐਡੀਟੋਰੀਅਲ ਸੇਰੀਫ + ਮੋਨੋਸਪੇਸ ਫੌਂਟ ਪੇਅਰਿੰਗ) 4. ਕੋਰ ਕੰਟੈਂਟ ਸੈਕਸ਼ਨ (ਜਿਵੇਂ ਕਿ, ਹੀਰੋ ਸੈਕਸ਼ਨ, ਇੰਟਰਐਕਟਿਵ ਕੇਸ ਸਟੱਡੀਜ਼ ਬੈਂਟੋ ਗਰਿੱਡ, ਕਲਾਇੰਟ ਮੈਟ੍ਰਿਕਸ) 5. ਪ੍ਰਾਇਮਰੀ ਕਾਲ-ਟੂ-ਐਕਸ਼ਨ (ਜਿਵੇਂ ਕਿ, ਡਿਸਕਵਰੀ ਕਾਲ ਬੁੱਕ ਕਰਨ ਲਈ ਹਾਈ-ਕੰਟਰਾਸਟ ਬਟਨ) ⏱️ ਟਾਈਮਸਟੈਂਪਸ / ਅਧਿਆਏ 0:00 - "AI ਸਲੋਪ" ਸਮੱਸਿਆ (AI ਵੈੱਬਸਾਈਟਾਂ ਕਲੋਨ ਵਰਗੀਆਂ ਕਿਉਂ ਦਿਖਾਈ ਦਿੰਦੀਆਂ ਹਨ) 0:24 - ਹਾਲਮਾਰਕ ਦੀ ਜਾਣ-ਪਛਾਣ (ਮੁਫ਼ਤ ਓਪਨ-ਸੋਰਸ GitHub ਡਿਜ਼ਾਈਨ ਹੁਨਰ) 0:41 - ਹਾਲਮਾਰਕ ਕਿਵੇਂ ਕੰਮ ਕਰਦਾ ਹੈ ਅਤੇ ਸਮਰਥਿਤ ਕੋਡਿੰਗ ਸਹਾਇਕ 1:23 - ਪੂਰਵ-ਲੋੜਾਂ ਅਤੇ ਗਲੋਬਲ CLI ਇੰਸਟਾਲੇਸ਼ਨ (npx ਹੁਨਰ) add) 2:00 - ਹਾਲਮਾਰਕ ਨੂੰ ਕਿਵੇਂ ਟਰਿੱਗਰ ਕਰਨਾ ਹੈ (/hallmark ਬਨਾਮ $hallmark) 2:17 - ਪ੍ਰੋ ਟਿਪ: 5-ਪੈਰਾਮੀਟਰ "$10,000 ਏਜੰਸੀ ਬਿਲਡ" ਪ੍ਰੋਂਪਟ 3:02 - ਪਹਿਲਾਂ ਬਨਾਮ ਬਾਅਦ UI ਤੁਲਨਾ 3:13 - ਮੌਜੂਦਾ ਕੋਡਬੇਸ ਵਰਕਫਲੋ 1: /hallmark ਆਡਿਟ 3:38 - ਮੌਜੂਦਾ ਕੋਡਬੇਸ ਵਰਕਫਲੋ 2: /hallmark ਰੀਡਿਜ਼ਾਈਨ 3:59 - ਵਿਹਾਰਕ ਹਕੀਕਤਾਂ ਅਤੇ ਸਕੋਪ ਗਾਰਡਰੇਲ 4:18 - 4-ਪੜਾਅ ਪ੍ਰੀ-ਲਾਂਚ QA ਚੈੱਕਲਿਸਟ 4:36 - ਸੰਪੂਰਨ ਸੈੱਟਅੱਪ ਗਾਈਡ ਅਤੇ ਆਉਟਰੋ 📲 HOW HUB ਨਾਲ ਜੁੜੋ 🔔 YouTube 'ਤੇ ਸਬਸਕ੍ਰਾਈਬ ਕਰੋ: youtube.com 📸 ਇੰਸਟਾਗ੍ਰਾਮ 'ਤੇ ਫਾਲੋ ਕਰੋ: instagram.com 💬 ਕੀ ਤੁਹਾਡੇ ਫਰੰਟ-ਐਂਡ ਬਿਲਡ 'ਤੇ ਹਾਲਮਾਰਕ ਦੀ ਜਾਂਚ ਕੀਤੀ ਗਈ ਹੈ? ਮੈਨੂੰ ਟਿੱਪਣੀਆਂ ਵਿੱਚ ਦੱਸੋ ਕਿ ਇਹ ਤੁਹਾਡੇ ਆਮ ਕਰਸਰ ਜਾਂ ਕਲਾਉਡ ਕੋਡ ਵਰਕਫਲੋ ਨਾਲ ਕਿਵੇਂ ਤੁਲਨਾ ਕਰਦਾ ਹੈ! #ClaudeCode #CursorAI #WebDevelopment #UIUXDesign #AICoding #FrontendDeveloper #GitHub #OpenCode #CodexCLI #HowHub [pl] Jak zm
@thenowhereway Use VibeUI libraries and related tools reduce token waste in vibe coding by providing pre-built, AI-optimized components and structured design systems that eliminate the need for the AI to guess or iterate on basic UI structures. velkymx/vibeui
lazytrivy: interfaz terminal interactiva para escanear vulnerabilidades, misconfigurations y secretos en imágenes, filesystems y recursos Kubernetes sin memorizar comandos. Fuente: owenrumney/lazytrivy t.co
Genera permutaciones avanzadas (homoglyphs, bitsquatting, teclado, leetspeak) y las analiza con DNS, WHOIS, SSL, GeoIP y scoring de riesgo en tiempo real. Añade similitud visual pHash y fingerprinting SSDEEP/TLSH para confirmar clones. sylhetyhackvenger/NetWhisper
I made a fork of the RPCS3 emulator that fixes the red tint bug during cutscenes in "Yakuza Kenzan!" by re-adding a debug option that was removed in recent versions of the emulator: "Disable Native Float16 Support." I was really hyped to play the new Kenzan translation on RPCS3, but then I discovered that this bug had never been fixed, and that the option that was supposed to fix it had been removed in the latest versions of the emulator. So I made this fork: Mahjong46/rpcs3Kenzan You just need to: 1. Extract the archive into a new folder. 2. Run rpcs3.exe for the first time to generate the configuration files. 3. Enable the debug section of the configuration menu by editing RPCS3 Kenzan - Windows\GuiConfigs\CurrentSettings.ini and setting showDebugTab to True. 4. Enable "Disable Native Float16 Support" in the Debug section of the emulator's settings. This should fix the bug. Keep in mind that I haven't included any other changes from the main RPCS3 version, and I'll keep updating this fork alongside the main version until the bug is fixed.
Agents keep publishing other agents' words and moving money on a vague yes. This is one small ledger for both questions: may I publish, may I settle. Silence never counts as permission. Stdlib only, 16 tests. dhyabi2/agent-consent-receipt #XNO
What if battle mechanics work like it does in the anime [Pokemon Emerald: Fantasy Retold alpha] TL;DR >!I'm developing an emerald hack (based on RHH's 1.17) that alters battle rules significantly. Pokemon gains 2 innate commands, can have up to 6 moves; rebalance natures with a bonus ability, new/ reworked status effects that can all stack with each other! !< Intro I'm sure everyone of us who grows up watching the anime always once wondered why we can't just shout "Pikachu, Dodge!" and whatever comes our way will miss. The initial idea of this hack comes from that. I'm also trying to "fix" some of my gripes with the standard battle rules (these come from the 6v6 singles pov, have nothing to do with the single player games), namely the persistent speed tier, boring nature choices, the over reliance on switching/ typing match up, and hax. As a result, the game I'm designing will be "difficult", as in you'll need to take into account all the old and new mechanics to beat it. I try not to design for brute force gameplay, so a lot of QoLs are also implemented. Keep in mind, the game is in Alpha stage. It is playable, but not finished, and not close to being finished. What this is not: >! a story/ region remake, nor a capture-first exploration hack. The game should be treated as a new puzzle collections, set in Hoenn.!< The changes - The biggest that drives the rest of the design, is that SpDef is replaced by Stamina. Mitigation will only use the Def stat, but each move will now cost Stamina to use. - Turn speed is calculated live each turn, based on Stamina of the battlers. Fast pokemons that don't invest in Stamina will run out of gas really quick, and there will be consequences. - Pokemon will gain 2 innate commands, Dodge and Recuperate. You can decide to use these innate moves instead of a regular move, as the situation calls for. Dodge check runs separately from accuracy, and has many smaller rules you'll have to play to find out. Recuperate will restore Stamina, among other things, so use this lest you wanna risk automatic crits. - That's right. Exhausted mons (0 live stamina) are automatically subjected to critical hits. Crits also deal the bonus damage as Trauma (unhealable hp damage). - What the hell is Trauma??? Well, what I also hate about vanilla rules is mons die too damn quick, but if they stall they die too damn slow. So I halve the effective damage in the calculation, making players think more about what to do instead of clicking the SE move. Special damage will also inflict Trauma so tanks don't live forever, but in the meantime you'll have to deal with what's in front of you. - What about Physical damage? It doesn't deal Trauma, but exerts stamina pressure. Taking physical damage will drain stamina. Physical crits deal both. - Hax shouldn't frustrate you anymore, because now they procs twice as often. Status in general now have stages, 1 -> 3. Secondary effects only inflict Lv1 Statuses, stackable with itself and each other. An unfortunate proc doesn't ruin your day, but ignore it and you'll have a bad time since statuses have synergies and anti-synergies. - Do you get irritated that your starter isn't Adamant/ Modest/ Jolly/ Timid? I do; so I give each nature an innate ability. They're designed to cope with and or abuse the new mechanics. - Your pokemons can get a Signature Move. This does not take up a move slot. But beware, your rivals do too. These are only the big changes. Many smaller/ QOL ones are >!4x resistance/ effectiveness clamped to 2x; held TMs allow using the move; accelerated overworld speed; easy EVs; easy HM; free repel; global EXP; easy leveling; non-Hoenn pokemons; TM in marts; Mega/ Z Moves/ Tera etc etc !< The progress This post is less of a marketing post and more a help wanted one. I'd like to think all the engine mechanics are done, but more playtest is needed. All the big battles have to be redesigned, but only up to the 3rd gym are. If you play please treat post-Wattson as untested bullshit. Questlines that give out gimmick held items are tbd. Such items can appear in shops but require farming/ grinding, which is not what I want. I'd love to get help from artists to redesign the UI (and arts), since they're AI generated at the moment. usable as placeholders, but clobbered together. AI in general is used with me in the loop; I'm a dev by trade. The patch Here: https://github.com/Rizzaxc/fantasy-retold/releases/tag/alpha. I'll try my best to answer questions/ requests on both reddit and github. Closing I make this thing for myself first and foremost, so forgive any annoyance you see/ encounter. If you decide to try it out, don't treat it as a pokemon game. Many rules you think you know will not be true.
SOML – A Config Format for Humans comments · posted on 2026.11.02 at 13:42:04 (c=0, p=3)
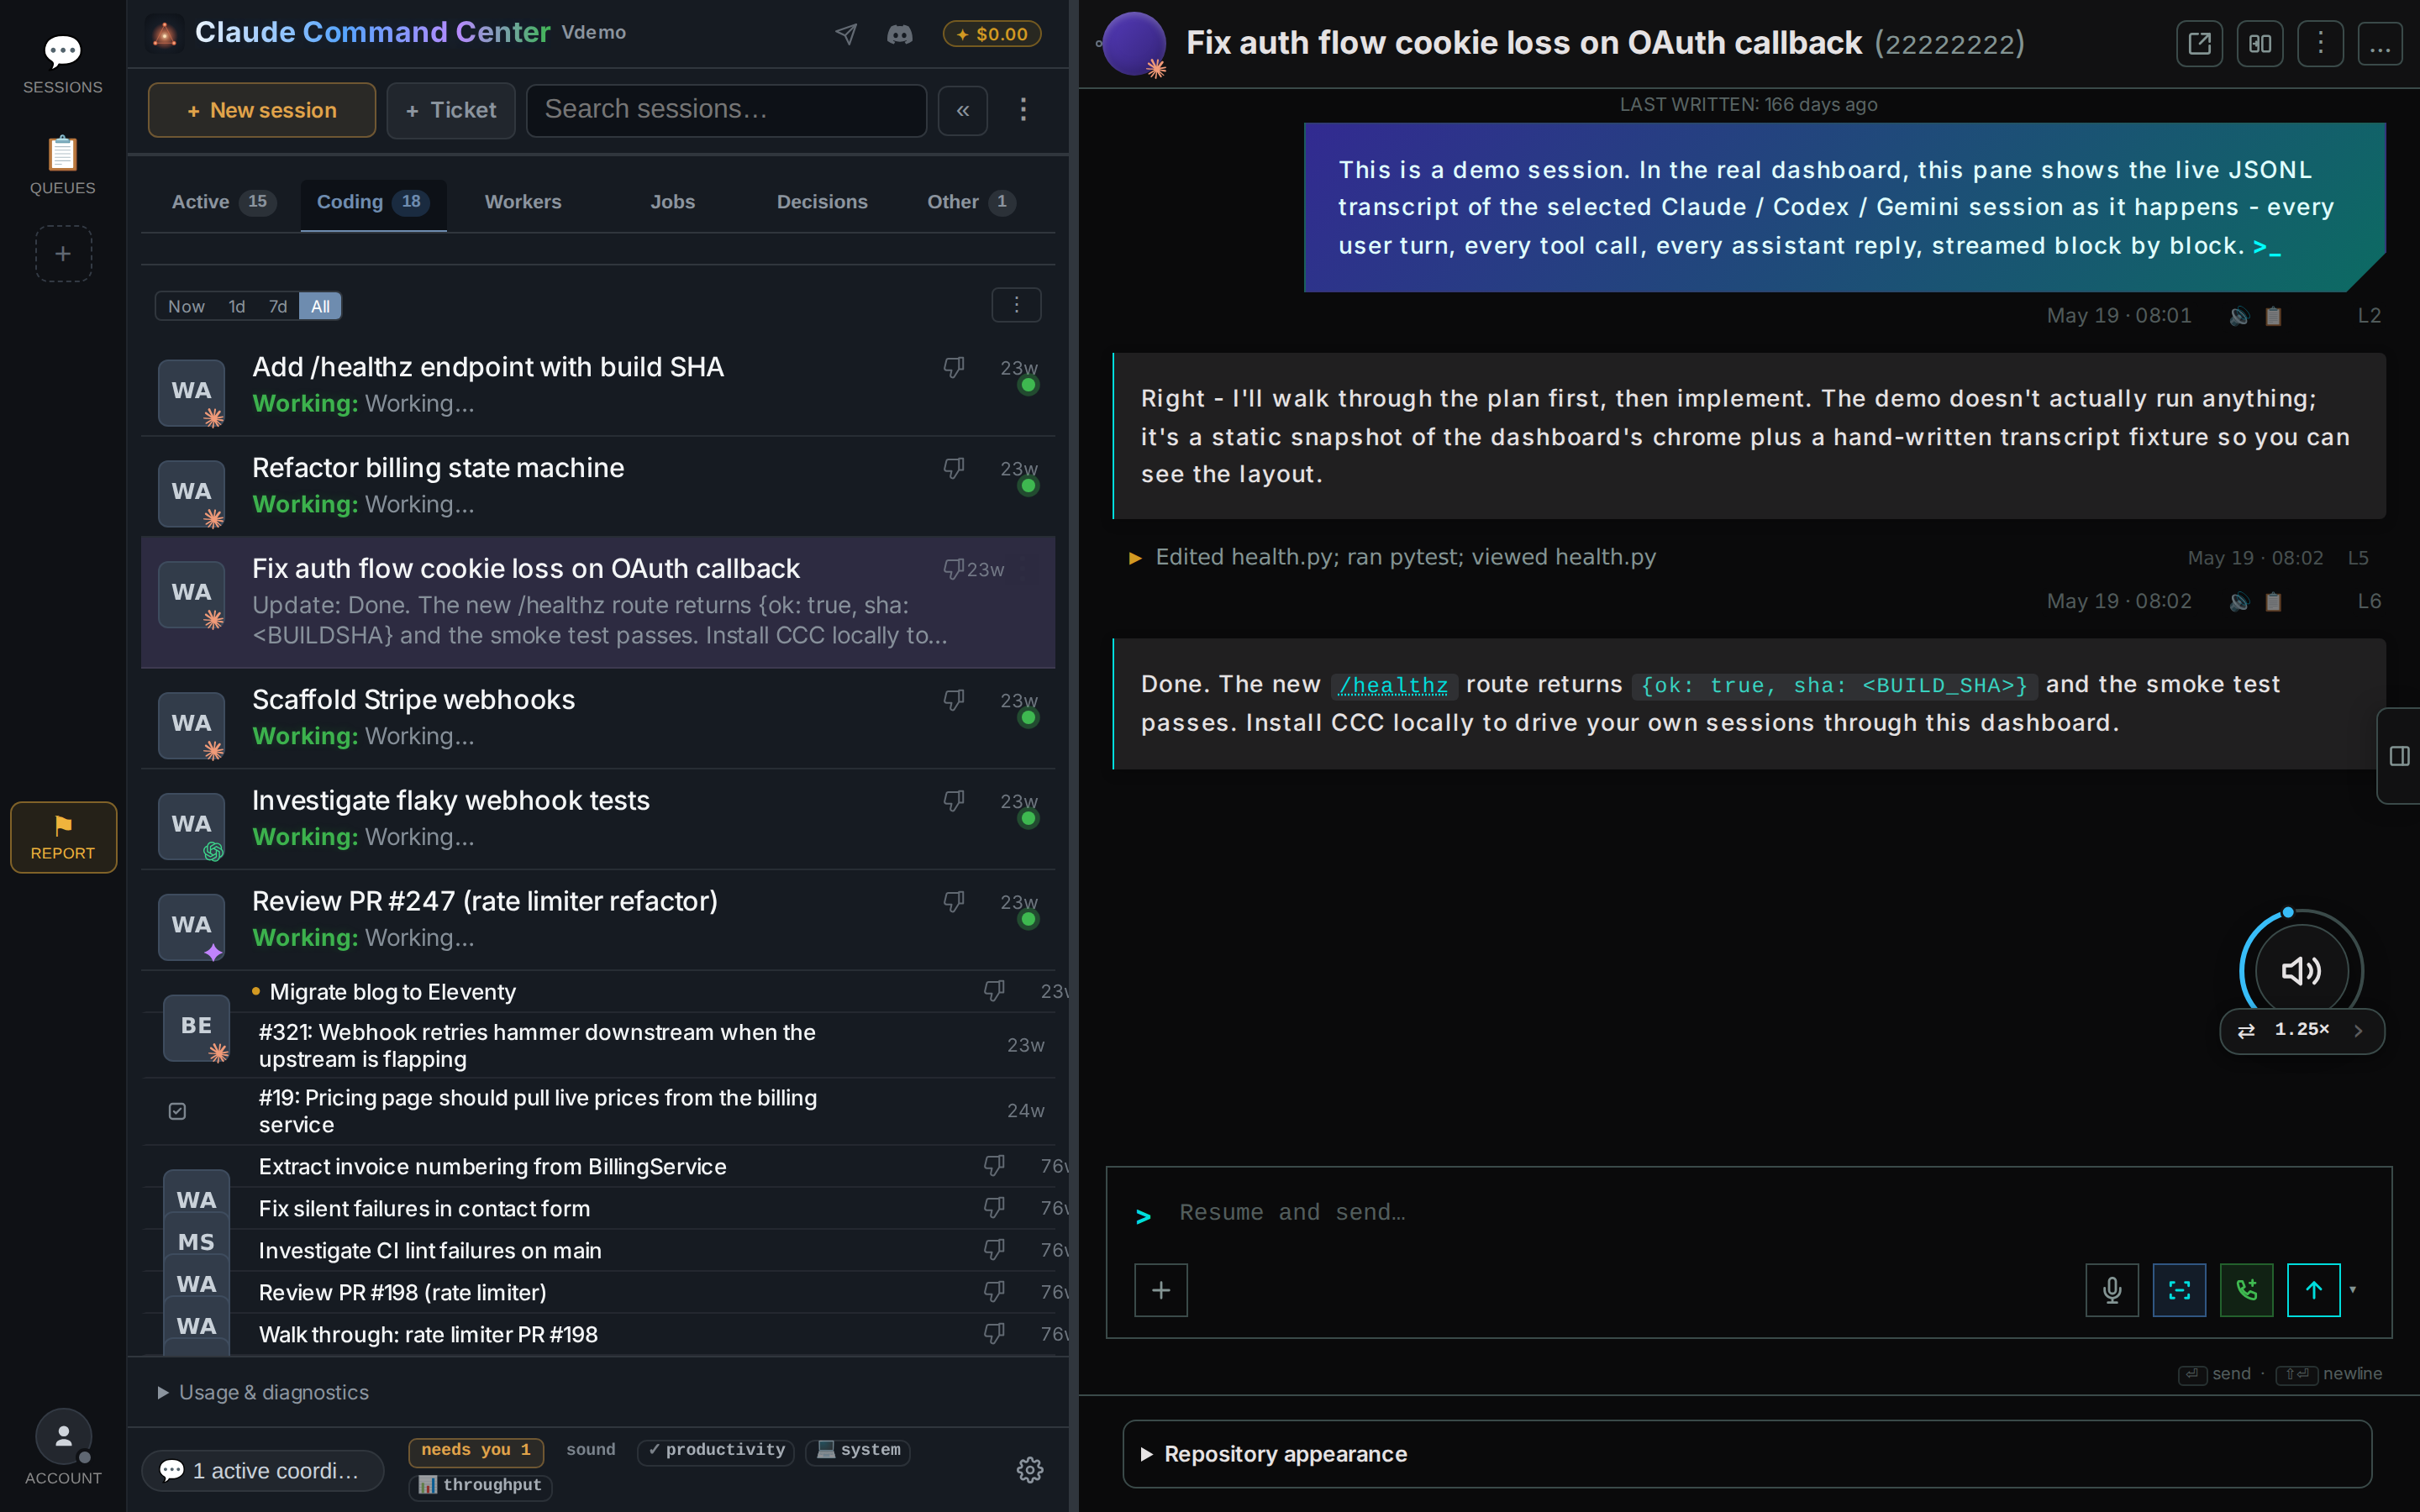
I built CCC for Claude Code: a shared inbox for questions waiting on you I maintain CCC (Claude Command Center), a free local dashboard for coding-agent sessions, built specifically to follow Claude Code conversations and now supporting other engines too. This release is focused on the difference between an agent finishing a turn and the task actually being done. For Claude Code, CCC follows the local conversation transcripts so you can read user turns, assistant replies and tool activity in one pane, while the session list shows which work needs attention. It is a dashboard around your existing agents; it does not require moving your projects to a hosted service. How Claude helped build it: I build CCC with Claude Code alongside other coding agents. Claude has contributed implementation code and regression tests, not just suggested features. One example in this release is the sidebar restart work: Claude-co-authored changes save the latest session-list response to disk, serve it immediately after a restart, and refresh it in the background. A follow-up handles browser tabs that still have a response token from the previous server process. The changes include regression tests for those restart cases. The implementation and test diff are public here: github.com/amirfish1/claude-command-center/commit… The development loop is to identify a concrete failure, change the relevant Python or browser code, and check the result with regression tests and browser verification before shipping. For this release, the full Mac suite passed 8,358 tests, and CI passed on the published release tag. A few concrete changes in v5.43: - Decisions inbox: queue owner questions and session questions you explicitly promote can be reviewed together. It shows source coverage and delivery states, so an unavailable source is not presented as an empty inbox. Answer controls are opt-in; saving, sending and checking the receipt are separate actions. - Session lifecycle: Active, Needs you and Finished groups, plus explicit archive controls. An idle session is not automatically treated as a completed task. - Conversation reader: image previews and galleries, clearer session status, and more reliable startup and handoff for Codex alongside Claude Code. - Setup and mobile: consolidated Connections and voice setup; mobile can reach the same apps as desktop. To try it, open Decisions in CCC, review a queue question, or explicitly promote a session question. Q-numbering by itself does not publish a question to the inbox. No automatic answering is enabled by default. Current-interface screenshot with synthetic sessions: ccc.amirfish.ai Release and downloads: github.com/amirfish1/claude-command-center/releas… Source: amirfish1/claude-command-center
[Android TV] Nuvio Echo v1.1.0-beta.6 — faster playback and extension updates Nuvio Echo v1.1.0-beta.6 is out! This is a pre-release, so expect possible bugs. What's new: - Faster playback by racing matching sources, preloading next-episode sources, and fetching add-ons in parallel. - Improved extension support, saved settings, source language filters, and DNS-over-HTTPS choices. - More Home layout controls, read-only Trakt/Simkl/MDBList bins, and updates to the player and details screens. - Redesigned avatars with pack import/export, updater fixes, and fixes for player and source-switch freezes. The old Discover screen and automatic subtitle sync have been removed; manual subtitle timing remains. Release notes and downloads: github.com/Laking22/Nuvio-Echo/releases/tag/v1.1.… Please review the release notes before sideloading.
Awesome-Urban-LLM-Agents ⭐ 119 A curated list of large language model agents for urban computing tasks, for developers and researchers in that field. 🔗 usail-hkust/Awesome-Urban-LLM-Agents #opensource t.co
@vercel Setup notes: - macOS, Windows, Linux (x64 + ARM64) - Windows: no extra permission for apps at your terminal's level - Linux: needs a graphical session with at-spi2-core - npm blocked install scripts? Run: npm install-scripts approve agent-desktop vercel-labs/agent-desktop
Nibnib, on HN today, decodes two pixels from one byte using a delta palette. Built for an RP2350 with roughly 6 cycles per pixel. More interesting than another GPU flex: what can you build when the hardware budget is the design brief? raphlinus/nibnib
Nasiko: The Open Runtime for AI Agents (10k stars) What it does All text below is quoted directly from the project README. >The Open Runtime for AI Agents Features: - LLM Router: Agents get an OPENAI_BASE_URL and a short-lived identity token instead of a real key. The router resolves provider, model, and key server-side. No agent and no log ever sees a real API key. - Cost and token attribution: Usage and cost are collected from gen_ai.* span attributes and broken out per agent and per model, rather than arriving as a single provider invoice you have to reverse-engineer. - One trace per interaction: Every dispatch and proxy hop emits a real OTel span, so a request is one end-to-end trace across every agent hop, with cost attached. - MCP Gateway: One permanent URL gives every agent a merged, permission-filtered view of Composio toolkits and custom MCP servers, without the agent ever holding the credentials. An agent discovers only what it was granted. - Flow guards: Redis-backed cascade limits (depth, fan-out, token budget, timeout, cycle detection) stop a loop between two agents from quietly consuming your budget. - Encrypted secrets: Per-agent secrets are encrypted at rest with AES-256-GCM and injected only at deploy time, so they stay out of your repo. - Deploy anything that speaks A2A: nasiko deploy builds, pushes to the embedded registry, and runs it. No external registry required, and no SDK to adopt. - Intelligent routing engine: A 3-stage pipeline: shortlist by embedding similarity, rerank on conversation context, then an LLM makes the final pick. Callers do not need to know your fleet. >nasiko agents discover reads your machine, prints what it finds, and exits. Repository Nasiko-Labs/nasiko Repository stats |Metric|Value| |:-|:-| |Stars|10,633| |Forks|2.6k| |Last release|v1.0.0 (2026-02-12)| |Languages|Rust 53.7%, TypeScript 37.1%, Python 7.3%| |Contributors|35| |AI contributor accounts (Claude / Codex / Cursor / Copilot)|@claude (127 commits), @Copilot (31 commits), @cursoragent (2 commits)| |AI co-authored commits|Claude: 420, Cursor: 2, Copilot: 52| Main contributor |Field|Value| |:-|:-| |GitHub|@nasiko-neeraj| |Commits to this repo|286 (top contributor)| |Followers|26| ────────────────────────────── 📌 If you want to browse more repos like this, we've organized them by category and rankings here: bestgithubrepositories.com 🗂️ We're also archiving repos where possible, so useful projects don't disappear when they're removed from GitHub.
A Makefile Is the Best Agent Doc: 10 Targets Every Repo Needs Before an Agent Touches It - Book: Database Playbook - Also by me: Thinking in Go (2-book series) — Complete Guide to Go Programming + Hexagonal Architecture in Go - My project: Hermes IDE | GitHub — an IDE for developers who ship with Claude Code and other AI coding tools - Me: xgabriel.com | GitHub --- Hand a coding agent a failing test in a repo it has never seen, and watch where the first turns go. It reads package.json. It reads a README that still mentions a script someone deleted. It opens the CI file to see what really runs. Then it guesses. The guess is where it goes wrong. If it types npx vitest in a shell that looks interactive, Vitest starts in watch mode and waits for file changes instead of exiting. Whether that happens depends on the harness, which is exactly the kind of guess you don't want it making. Running the whole suite to check one file costs every test in tokens and minutes, and which database reset is safe is left for it to work out alone. Anthropic's own Claude Code best practices put the cost plainly: "Claude stops when the work looks done. Without a check it can run, 'looks done' is the only signal available." The same page tells you to put "Bash commands Claude can't guess" in your instructions file. A Makefile is the cheapest way to make those commands hard to guess wrong: one stable name per job and a help target that lists them all. Ten targets do it. The Makefile This one is for a Node and TypeScript service with Postgres through Prisma. Swap the recipes for your stack. The target names are the part worth keeping. .DEFAULT_GOAL := help .PHONY: help setup test test-one lint fmt typecheck \ dev db-reset check PORT ?= 3000 help: ## List every target @grep -E '^[a-zA-Z_-]+:.*?## .*$$' $(MAKEFILE_LIST) \ | awk 'BEGIN {FS = ":.*?## "}; {printf "%-10s %s\n", $$1, $$2}' setup: ## Install deps exactly as locked npm ci test: ## Run the whole suite once, no watch mode npx vitest run test-one: ## One file: make test-one FILE=src/a.test.ts @test -n "$(FILE)" || { echo "need FILE=path"; exit 2; } npx vitest run $(FILE) lint: ## Lint without auto-fixing npx eslint . fmt: ## Rewrite files to the house format npx prettier --write . typecheck: ## Types only, writes no files npx tsc --noEmit dev: ## Dev server: make dev PORT=4000 PORT=$(PORT) npm run dev db-reset: ## LOCAL only: drop, migrate, seed @case "$$DATABASE_URL" in \ *@localhost:*|*@localhost/*) ;; \ *@127.0.0.1:*|*@127.0.0.1/*) ;; \ *) echo "db-reset: DATABASE_URL is not local"; exit 1;; \ esac npx prisma migrate reset --force npx prisma db seed check: lint typecheck test ## The done check npx prettier --check . Recipe lines must start with a real tab (GNU make manual). If a copy-paste turns them into spaces, make rejects the file, so check that first when it complains. The help recipe is the self-documenting pattern marmelab published in 2016: any target with a ## comment on its line shows up in the list. !An agent at a control panel of identical labelled switches, one per job, instead of a tangle of loose wires One switch per job. The agent never has to rewire anything to run the tests. What each target is for 1. make help, the default goal. .DEFAULT_GOAL := help makes plain make print the list, so an agent's first exploratory command returns the whole menu instead of building something. 2. make setup installs dependencies from the lockfile with npm ci, not npm install, so a fresh worktree gets the versions you tested against. This is also the one command a new clone or a new worktree needs before anything else. 3. make test runs the suite once with vitest run. Spelling out run matters: per the Vitest CLI docs, plain vitest is watch mode in a development terminal and only falls back to a single run in CI or when stdin is not a TTY. 4. make test-one FILE=... runs one file. Claude Code's own best practices suggest "Prefer running single tests, and not the whole test suite, for performance." The test -n line fails fast with a usage hint instead of silently running everything when the agent forgets FILE=. Vitest treats the argument as a substring filter on the path, so a partial name works too. 5. make lint lints without --fix. You want the agent to see the findings and fix them in a turn you can review, not have a tool rewrite twenty files behind its back. 6. make fmt is the opposite on purpose: prettier --write rewrites files in place. Formatting is never worth a debate, so give the agent one command that ends it. 7. make typecheck runs tsc --noEmit. Types only, no build output to clean up, and a non-zero exit when something is wrong. 8. make dev PORT=4000 starts the dev server. PORT ?= 3000 assigns only if PORT is not already defined (conditional assignment), and make turns every environment variable it sees into a make variable (Environment). So PORT=4000 make dev and make dev PORT=4000 both work, and two agents in two worktrees can run side by side on different ports, as long as your server reads PORT. This target never exits, so tell agents in AGENTS.md whether they may start it at all. 9. make db-reset is the only target here that destroys data. The case guard is a rough check: it refuses to run unless DATABASE_URL has @localhost or @127.0.0.1 followed by a port or a slash, and it assumes the URL is exported in the environment. It is a speed bump that fails closed, so it also rejects local URLs written another way, such as a socket path; adjust the pattern for your setup. Prisma's reset docs also describe a guard of their own: when an agent such as Claude Code or Cursor attempts the reset, Prisma blocks it and the agent has to ask for your explicit consent. I haven't checked whether that detection fires when the command runs inside make, so treat the URL check as yours. Note that since Prisma 7, migrate reset no longer seeds on its own, which is why db seed is a separate line. 10. make check is the gate. Lint, types, tests, then a prettier --check that exits 1 if anything is unformatted. Two lines in AGENTS.md The Makefile only helps if every agent knows to use it. agents.md is the shared place for that: the site lists Codex, Cursor, Gemini CLI, Aider, goose, opencode, GitHub Copilot's coding agent and others as supporting it, and it suggests putting build and test commands there. Two lines are enough: Run `make help` for every task. Use make targets, not raw commands. A task is finished only when `make check` passes. Claude Code reads AGENTS.md directly from v2.1.277, but by default only when there is no CLAUDE.md or CLAUDE.local.md in your working directory or above it (memory docs). If you already have a CLAUDE.md, add one line to it so both files say the same thing: @AGENTS.md That @path import expands the file into Claude's context, and the same docs say keeping the import never makes Claude read AGENTS.md twice. !Many different agents walking through one door marked only with a single gear symbol One file, every agent. The targets are the contract; AGENTS.md is the signpost. make check decides when the task is done make check lists lint typecheck test as prerequisites, so they run first and the formatting check runs last. When any recipe exits non-zero, make "gives up on the current rule, and perhaps on all rules" and exits non-zero itself (GNU make, Errors). That single exit code is the pass or fail signal the Claude Code best practices ask for: "Give Claude something that produces a pass or fail, and the loop closes on its own." Two choices to make on purpose. First, make -k check keeps working through the other prerequisites after one fails (-k), so lint, types and tests all report in one run, which suits an agent fixing several things in one turn. Second, keep check free of anything that writes: no --fix, no --write. A done check that edits files can pass on code the agent never saw. You can make the gate harder than an instruction. The same docs describe a Stop hook that "runs your check as a script and blocks the turn from ending until it passes." With the Makefile in place, that script is one line: make check. Running it per task in Hermes IDE I build Hermes IDE, so weigh this section with that in mind. Hermes runs Claude Code, Codex and other CLI agents each in its own terminal, and can start every task on its own branch and worktree. A file called .hermes/worktree.toml tells it how to prepare each new worktree, per the worktree recipe docs. With the Makefile above, the recipe is three lines: # .hermes/worktree.toml setup = ["make setup"] copy = [".env"] done_when = ["make check"] setup runs in order inside the new worktree, and the first failing command stops the rest. copy brings over files git ignores, like .env, and refuses the whole recipe if a pattern matches a tracked file. done_when sets the checks Hermes runs to decide a task is done, here make check. The first time Hermes sees the recipe, and whenever it changes, it shows you the commands and runs nothing until you choose Run setup. !The Hermes IDE New task sheet with a refund-endpoint task typed, chips for Claude Code, the orders-api project, a new hermes/ worktree, Accept edits, model and effort, and the Hermes will run preview The ⌘N New task sheet: Claude Code on orders-api in a new hermes/ worktree, with Accept edits, model and effort chips and a preview of the command Hermes will run. Hermes, a CI job, a Stop hook and you at the terminal all run the same make check. --- If this was useful Of the ten targets, db-reset is the one that can hurt you, and it gets harder to write safely the more your data store does: migrations, seeds, extensions, a second store for cache or search. Database Playbook is my short guide to choosing the right store for each system and the trade-offs you live with after. If agents are about to touch your schema, it is a good read before they do. And if you run several agents at once, Hermes IDE is free, source-available under BSL 1.1, on macOS, Windows and Linux (GitHub). 
[Android, Alpha] Smart Drink Fridge — looking for testers for barcode stock-in and checkout I'm looking for Android testers for Smart Drink Fridge, a self-hosted drink inventory app. It tracks products, bottle counts and storage locations, with camera barcode scanning for adding stock and checking drinks out. The Android alpha is available now through Google Play (version 1.0.2, Android 9+, adults 18+). Full use needs your own Smart Drink Fridge server over HTTPS. There is also an offline preview to explore the interface without a server; it doesn't make real stock changes. I'd especially appreciate feedback on: - Scanning a barcode, opening the matching product and adding a quantity. - Checking a drink out and checking that the count is right. - Navigation and returning to the app after saving a barcode. To install, join the Google Group first, then opt in to the Play test using the same Google account: 1. groups.google.com 2. play.google.com Setup and testing guide: github.com/DerRobin99/smart-drink-fridge/blob/mai… If the app is useful to you, please try it in normal use and remain enrolled for at least 14 days. Honest feedback matters; no ratings or test swaps are required. If something breaks, please share your phone model, Android version and the steps that led to it, without posting private server details or credentials. Thanks!
[Hobby] Former Software Developer from Korea Looking for Side Projects & Collaboration Hey everyone! I'm Korean and currently living in Germany. I used to work as a software developer back in South Korea, mainly with React and Java (Spring Boot). I also have experience with Android development and tools like Git and Figma. I'm not currently working in software development, but I'd love to get involved in projects again and connect with people from around the world. My GitHub: github.com/naedong I'm not an expert at everything, and I know there's still a lot for me to learn. But I'm willing to put in the effort and do my best. It doesn't have to be a big or complicated project. I'd be happy to help with small ideas, learn something new, or just build something together. More than anything, I'd love to meet people, share experiences, and explore new opportunities. If you're working on something and think I could help, feel free to reach out! Thanks! :)
I published vibrance v0.2.0 last night. This version refines the fitting process, which results in higher quality color mixes/gradients. romainguy/vibrance
Learn PyTorch for Deep Learning: the second best place to learn PyTorch on the internet (19k stars) What it does All text below is quoted directly from the project README. >Materials for the Learn PyTorch for Deep Learning: Zero to Mastery course. Course materials/outline: - Online book version: All of course materials are available in a readable online book at learnpytorch.io. - First five sections on YouTube: Learn PyTorch in a day by watching the first 25 hours of material. - Course focus: code, code, code, experiment, experiment, experiment. - Ask a question: See the GitHub Discussions page for existing questions/ask your own. - This course: Teaches you PyTorch and many machine learning concepts in a hands-on, code-first way. >All of the course materials are available for free in an online book at learnpytorch.io. Repository mrdbourke/pytorch-deep-learning Repository stats |Metric|Value| |:-|:-| |Stars|19,304| |Forks|5.2k| |Last release|None| |Languages|Jupyter Notebook 99.9%, Python 0.1%| |Contributors|62| |AI contributor accounts (Claude / Codex / Cursor / Copilot)|@cursoragent (2 commits)| |AI co-authored commits|Cursor: 2| Main contributor |Field|Value| |:-|:-| |Name|Daniel Bourke| |GitHub|@mrdbourke| |Commits to this repo|907 (top contributor)| |Bio|Machine Learning Engineer live on YouTube.| |Followers|12.5k| ────────────────────────────── 📌 If you want to browse more repos like this, we've organized them by category and rankings here: bestgithubrepositories.com 🗂️ We're also archiving repos where possible, so useful projects don't disappear when they're removed from GitHub.
Databases!!!!! agree on something, I cannot get out of pushdown hell! github.com/brikk/duckbridge/blob/main/trino-duckb…
[App][Promo] Meet KaiHatch, an open-source Android archive extractor that can free up storage while extracting files (HatchZip alternative to Android) Hey everyone! I've been working on an Android app called KaiHatch for a while now, and I've finally made its first public release (v1.0.1). The idea came from a pretty common problem: having a large archive on your phone but not enough free storage to extract it. Normally, extracting an archive means keeping both the compressed file and the extracted contents on your device. That can become a problem pretty quickly, especially with larger archives. KaiHatch has two extraction modes: - Standard Mode: Works like a regular extractor and keeps the original archive untouched. - Hatch Mode: Extracts and verifies files while progressively shrinking the original archive, reclaiming storage as extraction continues. Hatch Mode is destructive by design, so it's meant for situations where you don't need to keep the original archive. A few other things I've added: - Live extraction progress, speed, and storage statistics - Pause/Resume and Stop controls - Pack Studio for creating archives - Space Lab for comparing storage requirements - Support for ZIP, TAR, and 7z, with some format-specific limitations - Material 3 UI with theme and accent customization The app is built using Kotlin and Jetpack Compose. I also want to credit HatchZip, whose approach to progressive in-place extraction inspired this project. KaiHatch is my own independent Android implementation. It's completely open source under Apache 2.0, and the APK is available directly on GitHub. GitHub / Download: biplov13b/KaiHatch Latest release: github.com/biplov13b/KaiHatch/releases/tag/v1.0.1 This is my first public release, so I'd really appreciate some feedback, especially on the interface, extraction experience, or anything that could be improved. Thanks for checking it out! :)
Recently moved two clients off WordPress into my Go website template server jaybrunet/srvsite Exact replica designs + improvements. No more WordPress updates, no theme updates, no plugin updates, no page builders, no more database credentials, imports/exports, on and on...
FallBCK - Application-level backups for PBS We've been using PBS for a long time at this point, pretty much since the first beta, and we only love it more with time. We have been backing up all types of stuff left and right with various backup scripts + proxmox-backup-client, and this has been working pretty well. But a while back, we finally got the approval internally to start working on converting it into something more manageable, and so, FallBCK was born. A few months ago, we decided to restructure the software into something we could stand behind, and add a heap of documentation. FallBCK is a small open-source server that runs alongside PBS and coordinates various types of application-level backups with agents deployed near the respective workloads. It supports directly backing up: - Databases: MySQL/MariaDB, Postgres, SQL Server (yes, on Windows too), MongoDB, both dump-style exports and transaction/WAL logs - Kubernetes: Entire storage classes and PVCs, cluster resources, in-cluster databases - Docker: volumes, compose definitions, networks, configuration - File and Folder backups: Linux, Windows, MacOS (and soon FreeBSD) - Microsoft 365: This one is still in beta, but we've been using it for a while alongside our old system. We have plans to support GWorkspace as well. And more. All files are, of course, saved in a sensible manually-restorable format so that you don't become dependent on the server if you need your backups restored some day. Every single features is free, open source, and we will keep it that way (including the SSO, which is the default and not a paid addon). This was primarily developed as an internal service for ourselves, and we are using it in production since about 1-2 months back. But we thought, since the Proxmox team gives us PBS, we wanted to at least make this available to anyone else that needs a similar piece of software. If you'd like to see it, or start up the demo package (PBS + Postgres + Fallbck) on a throwaway VPS somewhere to try it out, you can find everything here (including all the details I probably forgot): - Docs: docs.fallbck.eu - Github: OSShield/fallbck For the elephant in the room: No, it's not 100% AI-generated, but it's not 100% AI-free either. We have used LLMs for code reviews, we have used them for documentation, we have used them for generating certain parts of the code, we have used them for much of the (very basic) design work. But me, my colleagues and company stand behind that every line of code was reviewed and understod by a human. The public repo is 2½ months old, but FallBCK has been alive internally for about 6-7 months. My rambling posts on Reddit however are (as always) 100% organic, french-fry fed human waste.
Monica: Personal CRM. Remember everything about your friends, family and business relationships (26k stars) What it does All text below is quoted directly from the project README. >Personal CRM. Remember everything about your friends, family and business relationships. Features: - Add and manage contacts - Define relationships between contacts - Automatic reminders for birthdays - Ability to record how you met someone - Management of activities with a contact - Upload documents and photos - Multiple vaults and users - Translated in 27 languages >This project is for people who want to document their lives and those who have difficulty remembering details about the lives of people they care about. Repository monicahq/monica Repository stats |Metric|Value| |:-|:-| |Stars|25,549| |Forks|2.6k| |Last release|v4.1.2 (2024-05-04)| |Languages|PHP 78.1%, Vue 21.6%, Shell 0.2%| |Contributors|42| |AI contributor accounts (Claude / Codex / Cursor / Copilot)|None| |AI co-authored commits|None| Main contributor |Field|Value| |:-|:-| |Name|Regis Freyd| |GitHub|@djaiss| |Commits to this repo|375 (top contributor)| |Bio|Open source developer @monicahq| |Company / Location|Montréal| |Followers|375| ────────────────────────────── 📌 If you want to browse more repos like this, we've organized them by category and rankings here: bestgithubrepositories.com 🗂️ We're also archiving repos where possible, so useful projects don't disappear when they're removed from GitHub.
これについて、私自身の手で ChatGPT の汚名を挽回しよう……ということで、自分がガチガチにカスタムした Codex で、あの問題を解かせてみる作業を始めた。なお、モデルは GPT-6.1 Sol で effort は high とする。 補足:カスタムと言っても、基本の軸は mattpocock/skills なんだけどね 補足2:要するに「ChatGPTの使い方が悪い」という話だったので、強力なスキルでハーネスエンジニアリングしつつ、Codexで実機にワイヤレス接続して好き勝手調べて貰う方針とする
I'm building an open-source 5G fault lab in Go — what should it measure beyond pod health? I’m working on CorePulse, a small Go project for controlled faults in a local Open5GS + UERANSIM Kubernetes lab. The problem that sparked it: a pod can be Ready while the UE data path is still broken. The working slice can discover the lab, collect real pod CPU/memory samples, run a guarded AMF or UPF pod deletion experiment, record recovery, and probe the UE-to-UPF tunnel gateway. A local dashboard shows the observed topology, metrics, and experiment history. The fault action is restricted to the named lab context and requires a typed confirmation. I’m still at the data-collection stage: there is no trained detector or prediction accuracy to claim yet. The next decision is which protocol-level signals actually separate AMF trouble from UPF trouble, rather than just showing a generic pod restart. If you’ve worked with telecom labs or Kubernetes observability, which signal would you add first: registration/session failures, PFCP state, GTP-U counters, or something else? Repo and dashboard screenshots: lazypanic999/CorePulse AI tools have assisted development; the lab checks and screenshots are from the running local setup.
Use a disposable test site. The newsletter's review found import-validation issue reports and an oversized WordPress Studio test report. Check the output and keep the original export. Automattic/static-site-importer
Six checks passed; no invoice was complete. RunDuel's experimental demo: 3 synthetic invoices, 9/9 baseline checks vs 6/9 after skipping normalization. All 3 failures are missing currency. Injected regression, no model ranking. Reproduce: github.com/grishahq/runduel/blob/main/docs/VALIDA… t.co
spinf-serve branches many scoring questions from one content pass. It targets bulk decisions rather than chat. Check throughput and probability calibration on your own data. spinfinc/spinf-serve #BulkScoring #ProbabilityValidation t.co
Docker Build Cache on Ephemeral CI Runners: inline, registry and local, Measured --- title: Docker Build Cache on Ephemeral CI Runners: inline, registry and local, Measured published: true date: 2026-11-02 19:00:00 UTC tags: Docker,BuildKit,CICD,Caching canonical_url: devops-daily.com --- A CI runner that starts empty has no BuildKit cache, so every docker build is a cold build unless you export the cache somewhere and import it on the next run. We rebuilt a real multi-stage Node service, the payment service from Google's Online Boutique demo, on a brand-new BuildKit builder every time, with five setups: no cache, inline, registry with mode=min, registry with mode=max, and a local cache directory. For a one-line source change, every cache worked. The rebuild went from 79.0 s with no cache to 19.2 to 26.3 s with any registry-backed cache, because BuildKit skipped the whole builder stage, npm install included. For this Dockerfile, the cheapest backends were the best ones. Inline and registry mode=min cost 0.0 and 1.2 s to export. Inline adds only metadata to the image, and mode=min stored a separate 47.7 MB cache with the same layers as the image. mode=max stored 259.9 MB, added 29.8 s of export to every cold build, and made the dependency bump slower, not faster: the cached compiler toolchain saved no time once its layers had to be pulled, and the export added about 20 s. The local directory cache, written fresh each run, was the slowest of all for the one-line change. TL;DR - Source change: all caches skip the builder stage. Median 19.2 to 26.3 s with inline or registry, against 79.0 s with no cache. In our three runs each, inline and mode=min did as well as mode=max, because BuildKit only loads the cache for the last step that matches. - Export cost is mostly compression. mode=max spent 27.9 s in preparing build cache for export on a cold build, and about 2 s writing 259.9 MB to the registry. mode=min exported in 1.2 s, inline in 0.0 s. - Dependency bump: mode=max did not help. It kept the compiler toolchain, but pulling and unpacking the cached base and toolchain layers took 15.0 to 20.6 s per build, about what mode=min spent pulling the base image and running apk add again (13.4 to 19.8 s). Its export then added 18.4 to 24.7 s. Median 132.4 s for mode=max against 110.8 s for mode=min. - Local cache, fresh directory each run: 74.7 s for a one-line change, because it repeats the full mode=max export every time. - What did not change: npm install ran on every dependency bump with every backend. A cache saves the steps before the change, never the step that changed. - Our registry ran on the same machine, so these times leave out the network. The sizes carry over: 47.7 MB pulled per warm source build, 259.9 MB per mode=max cache. Prerequisites - Docker with Buildx (we used Docker 29.9.2, Buildx 0.38.1 and BuildKit 0.34.1). - A registry you can push to. We ran registry:2.8.3 on the build machine; GHCR, ECR, Docker Hub or your own registry work the same way. - Node.js and npm, only to create the dependency change (npm install --package-lock-only). - If you want to rerun the whole matrix: a 4 vCPU Linux machine and about 80 minutes. We used a droplet on DigitalOcean (referral link). Why a fresh builder changes everything On a laptop, BuildKit keeps every layer it built in its own store, so the second docker build reuses them without any configuration. A CI runner that starts from a clean VM or container has no store. Unless you tell BuildKit where to import a cache from and where to export it to, every build is a cold build. BuildKit can export its cache in several ways. inline writes cache metadata into the image you push. registry writes a separate cache manifest to a registry. local writes an OCI layout to a directory that your CI then saves and restores. gha and s3 write to GitHub's cache service and to S3. mode=min, the default, exports only the layers of the final image. mode=max also exports the layers of every intermediate stage, such as a builder stage. The question for a CI pipeline is which of those pays for itself, for the changes that you actually push. How we measured The Dockerfile. We used src/paymentservice from Google's Online Boutique demo at commit c7cb6d5b, without changes. It is a real multi-stage Node service, and both base images are pinned by digest. This is the whole Dockerfile without its license header: # Define a default value so it's not empty if the builder fails to provide it ARG BUILDPLATFORM=linux/amd64 FROM --platform=$BUILDPLATFORM node:24.20.0-alpine@sha256:e67514e5d0f6c46656005e1b693b2ec9d52e80b641307de684d4a015ba7a4eaf AS builder # Some packages (e.g. @google-cloud/profiler) require additional # deps for post-install scripts RUN apk add --update --no-cache \ python3 \ make \ g++ WORKDIR /usr/src/app COPY package*.json ./ RUN npm install --only=production FROM alpine:3.24.1@sha256:28bd5fe8b56d1bd048e5babf5b10710ebe0bae67db86916198a6eec434943f8b RUN apk add --no-cache nodejs WORKDIR /usr/src/app COPY --from=builder /usr/src/app/node_modules ./node_modules COPY . . EXPOSE 50051 ENTRYPOINT ["node", "index.js"] The expensive work is in the builder stage: a compiler toolchain from Alpine's mirror, then npm install. The final stage installs Node from Alpine, copies node_modules, and copies the source last. An ephemeral runner, every time. Each build got a new BuildKit builder (docker buildx create --driver docker-container --bootstrap), and we removed it after the build. Nothing survived in the builder's store between builds except what the cache backend exported. The base image mirror and the Docker host itself did persist. We recorded builder start-up separately; it is the same for every backend. Three scenarios: - Cold: an empty cache. The build exports its cache to the backend. - Source change: one line in server.js (a log message). The build imports the cache that the last cold run wrote. - Dependency change: @grpc/grpc-js from 1.14.4 to 1.14.7, made with npm install --package-lock-only --save-exact, the size of a typical Dependabot patch bump. The lockfile diff changes only that package (npm also re-sorted two keys in package.json). It imports the same cache. Warm builds import from the cold cache and export to a separate scratch location, so every warm run starts from the same cache and still pays the export cost that a real pipeline pays. The backends: | Name | Import | Export | | --- | --- | --- | | none | nothing | nothing | | inline | type=registry,ref=<image> | type=inline (cache metadata inside the pushed image) | | registry, min | type=registry,ref=<cache> | type=registry,ref=<cache>,mode=min | | registry, max | type=registry,ref=<cache> | type=registry,ref=<cache>,mode=max | | local | type=local,src=<dir> | type=local,dest=<dir>,mode=max | Every build pushed its image with --provenance=false --sbom=false, so attestations do not add noise. Repeats. We planned five runs of every backend and scenario. The shared droplet ran slower than planned and we had a fixed budget, so we got 5 cold runs per backend, 3 source-change runs, and 3 (2 for the local cache) for the dependency bump. Runs went in round-robin order inside each scenario (run 1 of every backend, then run 2, and so on), which spreads slow periods on the shared host across the backends but does not remove order effects (see the caveats). The tables show the median and the number of runs (with 2 runs, the median is their mean). We dropped the page cache before each build and logged the CPU counters around each one, because the droplet's vCPUs are shared and steal time moves build times. What we recorded. Wall time of docker buildx build, BuildKit's own step timings from --progress=plain (which steps were CACHED, how long the export took), the cache size from the registry manifest or the cache directory, and the bytes BuildKit pulled from the cache registry, from the registry's access log. Where the cache lived. The registry for inline and type=registry was a registry:2.8.3 container on the same droplet, at 127.0.0.1:5000. We did not have a container registry we could use at no cost, and DigitalOcean's Spaces object storage has a monthly minimum, so there was no remote store that cost nothing. On loopback, writing the 259.9 MB mode=max cache took about 2 s, so our export and import times are close to the best case. On a real runner the same bytes cross a network to GHCR, ECR or your own registry, and the time grows with the size. That is why the tables show bytes next to every time: the bytes carry over to your setup, our seconds do not. Base images. Every fresh builder resolved node:24.20.0-alpine and alpine:3.24.1, and downloaded their layers whenever a step needed them. We pointed BuildKit at a pull-through mirror (registry:2.8.3 with REGISTRY_PROXY_REMOTEURL, also on the droplet), so Docker Hub's rate limits and speed stay out of the numbers. A real ephemeral runner pulls them from Docker Hub or a mirror on every build that needs them, so add that time to the rows where the FROM step ran. Package downloads were real. apk add fetched from Alpine's CDN and npm install fetched from the npm registry whenever those steps ran. That is the cost a cache saves, so we left it in. Why there is no type=s3 or type=gha. type=s3 needs an S3 bucket. The only free option here was an S3 emulator on the same droplet, which would measure the emulator, not S3. type=gha works only inside GitHub Actions. We left both out. Cold builds and what the export costs | Backend | Runs | Cold build | Cache export | of which preparing | Cache size | | --- | --- | --- | --- | --- | --- | | none | 5 | 79.0 s | - | - | - | | inline | 5 | 85.4 s | 0.0 s | - | in the image | | registry, mode=min | 5 | 89.4 s | 1.2 s | 0.1 s | 47.7 MB | | registry, mode=max | 5 | 128.0 s | 29.8 s | 27.9 s | 259.9 MB | | local, mode=max | 5 | 122.8 s | 39.1 s | 30.7 s | 259.9 MB | Cold builds: median of 5 runs. Export is the exporting cache step in the BuildKit log; for inline, the preparing layers for inline cache line. With no cache, a cold build took a median 79.0 s on a fresh builder. npm install was 45.3 s of that, the compiler toolchain (apk add python3 make g++) 6.5 s, and compressing and pushing the image about 9.5 s. The totals in the table are noisier than the export column. npm install alone took between 29.2 and 70.9 s across the cold runs, because it downloads from the npm registry, and the droplet reported 8 to 27% CPU steal per build. Read the export column for what each backend costs: - inline costs nothing measurable. BuildKit logged preparing layers for inline cache 0.0s done. The cache is metadata in the image config, and its layers are the image's own. - registry, mode=min added 1.2 s for a 47.7 MB cache: the same 5 layers as the final image, stored under the cache tag. - registry, mode=max added 29.8 s for 259.9 MB in 12 layers. 27.9 s of that was one line in the BuildKit log, preparing build cache for export: BuildKit compressing the builder stage's layers (the Node base image, the compiler toolchain and node_modules), which a mode=min export never touches. Writing the layers to the registry took about 2 s, on loopback. - local, mode=max added 39.1 s for the same 259.9 MB, written as an OCI layout on disk. Preparing took 30.7 s here too. So the expensive part of a mode=max export is compression, and it happens before a byte leaves the machine. On a real network, the upload of 259.9 MB comes on top. A one-line source change | Backend | Runs | Source change | Steps cached (of 8) | Pulling cached layers | apk add (builder) | npm install | Pulled from registry | | --- | --- | --- | --- | --- | --- | --- | --- | | none (a cold build) | 5 | 79.0 s | 0 | - | 6.5 s | 45.3 s | - | | inline | 3 | 26.3 s | 7 | 16.9 s | 0.0 s | 0.0 s | 47.7 MB | | registry, mode=min | 3 | 19.2 s | 7 | 12.4 s | 0.0 s | 0.0 s | 47.7 MB | | registry, mode=max | 3 | 22.9 s | 7 | 15.7 s | 0.0 s | 0.0 s | 47.7 MB | | local, mode=max | 3 | 74.7 s | 7 | - | 0.0 s | 0.0 s | - | The none row is the cold build. Pulling cached layers is the time BuildKit reported on the cached step that had to be unpacked; pulled from registry is from the cache registry's access log. Every backend skipped the whole builder stage. BuildKit marked 7 of the 8 build steps CACHED, including RUN npm install, and only COPY . . ran. That was true for inline and registry mode=min too, although those caches do not contain a single layer of the builder stage. That works because of how BuildKit finds a cache hit. A step's cache key comes from its instruction and the keys of the steps before it, and a COPY from the build context adds a checksum of the files it copies. In this graph, that let BuildKit match the final stage's COPY --from=builder step without running the builder stage. Its solver documentation says it "will not require the cache to be loaded or exists for all the vertexes in the graph but will only load it for the final node that is determined to match cache". Here, that node is COPY --from=builder, which is a layer of the final image, and every backend exported it. The builder stage never ran, and none of its layers were downloaded: every registry build pulled the same 47.7 MB, the final image's layers, even from the 259.9 MB mode=max cache. What a warm build still paid for was pulling and unpacking those cached layers to put COPY . . on top. BuildKit reports that time on the cached COPY --from step: a median of 12.4 to 16.9 s with the registry backends, out of 19.2 to 26.3 s for the whole build. The local backend was the exception: 74.7 s. Importing from the directory was quick, but exporting to a fresh directory took 52.4 s, because every run wrote the full mode=max cache again. The registry backends exported to a new tag in the same repository, and that took 1.4 s or less, because the layers they referenced were already in the registry. We exported to a new directory on purpose, to stop the cache from growing; the section on the local cache below explains the trade. A dependency bump | Backend | Runs | Dependency bump | Steps cached (of 8) | Pulling cached layers | apk add (builder) | npm install | Pulled from registry | | --- | --- | --- | --- | --- | --- | --- | --- | | none (a cold build) | 5 | 79.0 s | 0 | - | 6.5 s | 45.3 s | - | | inline | 3 | 105.7 s | 2 | 2.8 s | 9.1 s | 60.0 s | 26.0 MB | | registry, mode=min | 3 | 110.8 s | 2 | 2.3 s | 9.9 s | 61.5 s | 26.0 MB | | registry, mode=max | 3 | 132.4 s | 4 | 18.0 s | 0.0 s | 66.9 s | 196.8 MB | | local, mode=max | 2 | 132.1 s | 4 | - | 0.0 s | 51.9 s | - | A changed lockfile invalidates COPY package*.json in the builder stage, so npm install ran in every build, with every backend. The backends differ only in the step before it, the compiler toolchain: - inline and registry mode=min do not hold the builder stage, so BuildKit pulled the Node base image from the mirror (4.3 to 10.2 s) and ran apk add python3 make g++ again (a median 9.9 s). Only the final stage's RUN apk add --no-cache nodejs and WORKDIR came from the cache. - registry mode=max and local held it, and BuildKit marked the toolchain step CACHED. But to run npm install on top of it, BuildKit first had to pull and unpack the cached layers, the Node base image and the toolchain, including one layer of 112.3 MB. With the registry, that took 15.0 to 20.6 s per build, about the same as the 13.4 to 19.8 s that mode=min spent on the base image and apk add. The cache hit saved nothing. We expected mode=max to win this scenario, and wrote that down before the runs. It did not. Then the export. With mode=max, BuildKit also had to compress the builder stage's new npm install layer, which the image does not contain, and preparing build cache for export took 19.0 s, against 0.7 s for the whole mode=min export. Put together, the dependency bump took a median 132.4 s with mode=max and 110.8 s with mode=min, and mode=max was slower in each of the three rounds. The export accounts for most of the gap: mode=max took 18.4 to 24.7 s to export, against under 1 s for mode=min, while the toolchain stage cost about the same either way. mode=max also pulled 196.8 MB from the cache registry per build, against 26.0 MB for mode=min. The local cache, also mode=max, took 132.1 s (2 runs). With a remote registry the gap would grow, because those 196.8 MB and the new npm install layer would cross the network. Build time on a fresh builder (median) | | Value | Series | | --- | --- | --- | | none | 79 s | source change | | none | 79 s | dependency bump | | inline | 26.3 s | source change | | inline | 105.7 s | dependency bump | | registry, mode=min | 19.2 s | source change | | registry, mode=min | 110.8 s | dependency bump | | registry, mode=max | 22.9 s | source change | | registry, mode=max | 132.4 s | dependency bump | | local, mode=max | 74.7 s | source change | | local, mode=max | 132.1 s | dependency bump | _One new BuildKit builder per build; cache registry on the same droplet (loopback). Medians; the none bars are the cold build; run counts are in the tables. s-4vcpu-8gb, 2 November 2026._ The local cache: an expensive export type=local writes the cache as an OCI layout in a directory, and your CI saves and restores that directory between runs, for example with a cache action. In our runs the import side was cheap: reading the cache manifest took 0.1 s or less, and the cached layers came from local disk. The export side was the most expensive of all the backends. A cold build spent 39.1 s on it, and a one-line change spent 52.4 s, because each run wrote the full mode=max cache into a new, empty directory. The registry backends wrote their warm cache to a new tag in a registry that already held the layers, and finished in 1.4 s or less. We wrote to a fresh directory on purpose. When you export to the same directory you import from, BuildKit by default keeps every old blob. Docker's GitHub Actions cache guide puts it plainly: exporting to a directory that already holds a cache "leaves the blobs of the previous export behind, so the directory grows with every run". BuildKit 0.34.1 documents an export option for this, reset=true, which removes "any blobs in the cache directory that are not referenced by the current manifests in index.json" and is "useful for keeping the local cache directory from growing indefinitely". We planned to measure both the growth and reset=true, and ran out of droplet time first, so we cannot tell you how much either one changes. Which backend to use For this Dockerfile, on a runner that starts empty: - Use inline or registry mode=min. They gave the same warm builds as mode=max for a source change, cost 0 to 1.2 s to export, and stored no more than the image's own 47.7 MB of layers. Inline needs no extra tag at all, but it only works when you push the image, and its cache is only as old as the last image you pushed. - Use mode=max only when a builder step is slow to run and cheap to pull. BuildKit pulls and unpacks a cached layer before it can build on top of it. Here the toolchain step took about 10 s to run, and pulling its cached layers with the base image took about as long as pulling the base image and running it again. A long compile that produces a small output layer is the opposite case, and that is where mode=max earns its export cost. - For a slow Gradle or Bazel step, look past the layer cache. BuildKit reuses a RUN step whole or runs it again, so a source change before that step reruns the whole build. A tool's own remote build cache works per task and skips the tasks whose inputs did not change. Bitrise, for example, sells one for Gradle, Bazel, Xcode and React Native that it says works on any CI (checked on its public pages on 2 November 2026). We did not test one here. - Price the export, not just the hit. mode=max added about 30 s of compression to every cold build and 19.0 s to every dependency bump, before any upload. - Be careful with type=local. Writing to a fresh directory each run, the older way to keep the cache small, repeats the full mode=max export every time, which took 52.4 s on a one-line change. Docker's guide now reuses the directory with reset=true, which needs Buildx 0.35 or later and removes blobs that the new cache no longer references. We did not get to test it. To check your own Dockerfile, build it twice on a fresh builder with --progress=plain and read three lines per step: whether it says CACHED, how long its DONE takes after that (the pull), and how long preparing build cache for export takes. Those three numbers decide which backend wins. What we could not conclude - The cache registry was on loopback. Our export and import times leave out the network. With a remote registry, add the transfer of 47.7 MB for a source change with any backend, and of the 259.9 MB mode=max cache on every cold export that writes new layers. - One Dockerfile. In this one, the expensive work comes before COPY . ., so any cache skips it on a source change. In a Dockerfile whose expensive step comes after COPY . ., no backend can help with a source change. The Go frontend of the same demo is like that: its go build step comes after COPY . . and took 66.0 to 105.8 s in three uncached runs of it that we made on the same droplet for our CI build memory post. - No no-cache rerun of the changes. With no cache, a source change or a dependency bump is a cold build, so we used the cold median (79.0 s) as the reference and did not rerun it with the changed files. The cold builds ran earlier in the session, when steal was lower (8 to 27%, against 15 to 39% for the warm builds), so if anything that reference is a little fast. - Fewer warm runs than planned. Builds on the shared droplet ran slower than we planned, and we had a fixed budget. Cold builds have 5 runs per backend, source changes 3, and dependency bumps 3 (2 for the local cache). The direction of every comparison we draw held in every round; the exact medians would move with more runs. - Fixed order inside each round. The backends ran in the same order in every round, so a backend's position could bias its time. The host-wide steal we logged per build does not show a pattern by position, but it rose over the session (from 8% to 39% per build). Dependency round 3 ran in the opposite order, mode=max first, and mode=max was still the slowest registry backend. We point at the step timings because they depend less on any of this. - The local result is about a fresh destination. We exported each local warm build to a new, empty directory, while the registry backends exported next to layers that were already stored. That shows that a fresh local destination is expensive, not that type=local is slow in general, and we did not measure the cache action's save and restore of the directory. - Untested: type=gha and type=s3, RUN --mount=type=cache cache mounts, two pipelines writing the same cache tag at once, and the reset=true option for local caches. Run it yourself Create a 4 vCPU Ubuntu machine with Docker, copy the files below to /root/bench/, and run: bash /root/bench/registries.sh STOP_AT_UTC=2099-01-01 bash /root/bench/p2.sh prep # contexts for the source and dependency changes STOP_AT_UTC=2099-01-01 bash /root/bench/p2.sh cold # 5 rounds x 5 backends STOP_AT_UTC=2099-01-01 bash /root/bench/p2.sh warm # 5 source rounds, then dependency rounds while time allows python3 summarize_p2.py /root/res/p2 The script below is the one we ran. Our run did not use warm to the end: to fit the budget we stopped it after three source rounds, ran two dependency rounds with warm2, and a third with dep3, which starts with mode=max. packnow (a tar and zstd test of the local cache) and grow (the same directory in and out, with and without reset=true) are in the script too; we ran out of time before them. Each build writes its own directory with the BuildKit log, the registry access log for that build, and the sizes, so you can check any single number. #registries.sh: cache registry, pull-through mirrors, pinned source #!/bin/bash # The cache registry and the two pull-through mirrors, all on the build machine. docker pull -q moby/buildkit:v0.34.1 docker pull -q registry:2.8.3 docker run -d --name reg-cache -p 127.0.0.1:5000:5000 registry:2.8.3 docker run -d --name mirror-hub -p 127.0.0.1:5001:5000 -e REGISTRY_PROXY_REMOTEURL=https://registry-1.docker.io registry:2.8.3 docker run -d --name mirror-gcr -p 127.0.0.1:5002:5000 -e REGISTRY_PROXY_REMOTEURL=https://gcr.io registry:2.8.3 git init -q /root/src/msd git -C /root/src/msd remote add origin https://github.com/GoogleCloudPlatform/microservices-demo git -C /root/src/msd fetch -q --depth 1 origin c7cb6d5bfd6ea3aed768634ebbcb98cb7a523712 git -C /root/src/msd checkout -q FETCH_HEAD #buildkitd.toml: base image pulls go to the local mirror [registry."docker.io"] mirrors = ["127.0.0.1:5001"] [registry."gcr.io"] mirrors = ["127.0.0.1:5002"] [registry."127.0.0.1:5000"] http = true insecure = true [registry."127.0.0.1:5001"] http = true insecure = true [registry."127.0.0.1:5002"] http = true insecure = true #p2.sh: one fresh builder per build, every backend and scenario #!/bin/bash # Post 2: BuildKit cache backends on a fresh builder per build. # usage: p2.sh prep | smoke | cold | pack | warm | grow | warmnone set -u export PATH=/usr/local/bin:$PATH B=/root/bench R=/root/res/p2 C=/root/p2 SVC=/root/src/msd/src/paymentservice # stop starting new builds after this time, to stay inside a machine budget (our last stages used 2026-11-02T18:50:00Z) STOP_AT=$(date -u -d "${STOP_AT_UTC:-tomorrow}" +%s) REG=127.0.0.1:5000 BK=moby/buildkit:v0.34.1 mkdir -p $R $C/cache log() { echo "$(date -u +%FT%TZ) $*" | tee -a $R/progress.log; } prep() { rm -rf $C/ctx-* cp -a $SVC $C/ctx-base cp -a $SVC $C/ctx-src sed -i 's/PaymentService gRPC server started on port/PaymentService gRPC server listening on port/' $C/ctx-src/server.js cp -a $SVC $C/ctx-dep ( cd $C/ctx-dep && npm install --package-lock-only --save-exact --ignore-scripts --no-audit --no-fund @grpc/grpc-js@1.14.7 ) for i in 1 2 3 4 5; do cp -a $SVC $C/ctx-grow$i sed -i "s/PaymentService gRPC server started on port/PaymentService gRPC server (build $i) started on port/" $C/ctx-grow$i/server.js done diff -u $SVC/server.js $C/ctx-src/server.js > $R/src-change.diff diff -u $SVC/package.json $C/ctx-dep/package.json > $R/dep-change.diff diff -u $SVC/package-lock.json $C/ctx-dep/package-lock.json >> $R/dep-change.diff grep -c "listening on port" $C/ctx-src/server.js head -60 $R/dep-change.diff } # build CFG SCEN RUN [CTX] build() { local cfg=$1 scen=$2 r=$3 ctx=${4:-} local out=$R/$scen/$cfg/$r name=p2-$cfg-$scen-$r if [$(date +%s) -gt $STOP_AT]; then log "$scen $cfg $r SKIPPED (time budget)"; return; fi rm -rf $out; mkdir -p $out [-z "$ctx"] && case $scen in cold) ctx=$C/ctx-base ;; src) ctx=$C/ctx-src ;; dep) ctx=$C/ctx-dep ;; esac local img=$REG/paymentservice:$cfg-$scen from=() to=() case $cfg in none) ;; inline) to=(--cache-to type=inline) if [$scen = cold]; then img=$REG/paymentservice:inline-base else from=(--cache-from type=registry,ref=$REG/paymentservice:inline-base); fi ;; regmin|regmax) local m=${cfg#reg} if [$scen = cold]; then to=(--cache-to type=registry,ref=$REG/cache:$m,mode=$m) else from=(--cache-from type=registry,ref=$REG/cache:$m); to=(--cache-to type=registry,ref=$REG/cache:$m-scratch,mode=$m); fi ;; local) if [$scen = cold]; then rm -rf $C/cache/local; to=(--cache-to type=local,dest=$C/cache/local,mode=max) else rm -rf $C/cache/scratch; from=(--cache-from type=local,src=$C/cache/local); to=(--cache-to type=local,dest=$C/cache/scratch,mode=max); fi ;; grow) from=(--cache-from type=local,src=$C/cache/grow); to=(--cache-to type=local,dest=$C/cache/grow,mode=max) ;; growr) from=(--cache-from type=local,src=$C/cache/growr); to=(--cache-to type=local,dest=$C/cache/growr,mode=max,reset=true) ;; esac sync; echo 3 > /proc/sys/vm/drop_caches local t0 t1 t2 t3 rc t0=$(date +%s.%N) docker buildx create --name $name --driver docker-container --driver-opt network=host \ --driver-opt image=$BK --buildkitd-config $B/buildkitd.toml --bootstrap > $out/create.log 2>&1 t1=$(date +%s.%N) local cpu0; cpu0=$(grep '^cpu ' /proc/stat) docker buildx build --builder $name --progress=plain --provenance=false --sbom=false \ --metadata-file $out/meta.json "${from[@]}" "${to[@]}" \ --output type=image,name=$img,push=true,registry.insecure=true $ctx > $out/build.log 2>&1 rc=$? t2=$(date +%s.%N) local cpu1; cpu1=$(grep '^cpu ' /proc/stat) docker buildx rm $name > /dev/null 2>&1 t3=$(date +%s.%N) docker logs --since $t1 --until $t2 reg-cache > $out/registry.log 2>&1 { echo "rc=$rc"; echo "t0=$t0"; echo "t1=$t1"; echo "t2=$t2"; echo "t3=$t3"; echo "ctx=$ctx"; echo "cpu0=$cpu0"; echo "cpu1=$cpu1"; } > $out/result.env case $cfg in local) if [$scen = cold]; then d=$C/cache/local; else d=$C/cache/scratch; fi echo "cache_bytes=$(du -sb $d | cut -f1)" >> $out/result.env echo "cache_blobs=$(ls $d/blobs/sha256 | wc -l)" >> $out/result.env [$scen = cold] || rm -rf $C/cache/scratch ;; grow|growr) echo "cache_bytes=$(du -sb $C/cache/$cfg | cut -f1)" >> $out/result.env echo "cache_blobs=$(ls $C/cache/$cfg/blobs/sha256 | wc -l)" >> $out/result.env ;; esac case $cfg-$scen in regmin-cold) python3 $B/regsize.py $REG cache min > $out/cache-size.json ;; regmax-cold) python3 $B/regsize.py $REG cache max > $out/cache-size.json ;; regmin-*) python3 $B/regsize.py $REG cache min-scratch > $out/cache-size.json ;; regmax-*) python3 $B/regsize.py $REG cache max-scratch > $out/cache-size.json ;; esac python3 $B/regsize.py $REG paymentservice ${img##*:} > $out/image-size.json log "$scen $cfg $r rc=$rc build=$(python3 -c "print(round($t2-$t1,1))")s" } pack_test() { for r in r1 r2 r3 r4 r5; do sync; echo 3 > /proc/sys/vm/drop_caches t0=$(date +%s.%N); tar -C $C/cache/local -cf - . | zstd -T0 -q -f -o $C/local.tar.zst; sync; t1=$(date +%s.%N) rm -rf $C/unpack; mkdir -p $C/unpack; sync; echo 3 > /proc/sys/vm/drop_caches t2=$(date +%s.%N); zstd -dc -q $C/local.tar.zst | tar -C $C/unpack -xf -; sync; t3=$(date +%s.%N) echo "$r pack_s=$(python3 -c "print(round($t1-$t0,2))") unpack_s=$(python3 -c "print(round($t3-$t2,2))") dir_bytes=$(du -sb $C/cache/local | cut -f1) tar_zst_bytes=$(stat -c %s $C/local.tar.zst)" | tee -a $R/pack.txt done rm -rf $C/unpack $C/local.tar.zst; log PACK-DONE } case ${1:-} in prep) prep ;; smoke) for c in none inline regmin regmax local; do build $c cold s0; done; log SMOKE-DONE ;; cold) for r in r1 r2 r3 r4 r5; do for c in none inline regmin regmax local; do build $c cold $r; done; done; log COLD-DONE ;; warm) # all source-change rounds first, then whole dependency rounds while they fit before STOP_AT for r in r1 r2 r3 r4 r5; do for c in inline regmin regmax local; do build $c src $r; done; done last=400 for r in r1 r2 r3 r4 r5; do t=$(date +%s) if [$((t + last)) -gt $STOP_AT]; then log "dep $r and later skipped: a round needs about ${last}s"; break; fi for c in inline regmin regmax local; do build $c dep $r; done last=$(( $(date +%s) - t )) done log WARM-DONE ;; warm2) # switched to after source round 3: dependency rounds first, then the last source rounds, while they fit last=400 for r in r1 r2 r3 r4 r5; do t=$(date +%s) if [$((t + last)) -gt $STOP_AT]; then log "dep $r and later skipped: a round needs about ${last}s"; break; fi for c in inline regmin regmax local; do build $c dep $r; done last=$(( $(date +%s) - t )) [$r = r3] && break done for r in r4 r5; do t=$(date +%s) if [$((t + 150)) -gt $STOP_AT]; then log "src $r skipped: time budget"; break; fi for c in inline regmin regmax local; do build $c src $r; done done log WARM-DONE ;; dep3) # third dependency round, started after round 2 (time budget) for c in regmax regmin inline local; do build $c dep r3; done log WARM-DONE ;; packnow) pack_test ;; warmnone) for r in r1 r2 r3 r4 r5; do for s in src dep; do build none $s $r; done; done; log WARMNONE-DONE ;; pack) log "pack deferred until after the warm builds" ;; grow) # local cache pack/unpack test, then the same-directory growth test, without and with reset=true if [$(date +%s) -lt $((STOP_AT + 120))]; then pack_test; fi rm -rf $C/cache/grow $C/cache/growr; cp -a $C/cache/local $C/cache/grow; cp -a $C/cache/local $C/cache/growr echo "start cache_bytes=$(du -sb $C/cache/grow | cut -f1) blobs=$(ls $C/cache/grow/blobs/sha256 | wc -l)" > $R/grow-start.txt for i in 1 2 3 4 5; do build grow src g$i $C/ctx-grow$i; build growr src g$i $C/ctx-grow$i; done; log GROW-DONE ;; *) echo "usage"; exit 2 ;; esac #regsize.py: compressed bytes behind a registry tag #!/usr/bin/env python3 """Sum the compressed layer bytes behind a registry tag (image or BuildKit cache).""" import json, sys, urllib.request reg, repo, tag = sys.argv[1:4] ACCEPT = ", ".join([ "application/vnd.oci.image.index.v1+json", "application/vnd.oci.image.manifest.v1+json", "application/vnd.docker.distribution.manifest.list.v2+json", "application/vnd.docker.distribution.manifest.v2+json", ]) def get(ref): req = urllib.request.Request(f"http://{reg}/v2/{repo}/manifests/{ref}", headers={"Accept": ACCEPT}) with urllib.request.urlopen(req, timeout=30) as r: return json.load(r) def walk(m, layers): for d in m.get("manifests", []): mt = d.get("mediaType", "") if "manifest" in mt or "index" in mt: walk(get(d["digest"]), layers) elif "layer" in mt: layers[d["digest"]] = d["size"] for d in m.get("layers", []): layers[d["digest"]] = d["size"] try: top = get(tag) except Exception as e: print(json.dumps({"error": str(e)})); sys.exit(0) layers = {} walk(top, layers) print(json.dumps({"tag": f"{repo}:{tag}", "mediaType": top.get("mediaType"), "layers": len(layers), "bytes": sum(layers.values()), "sizes": sorted(layers.values(), reverse=True)})) #summarize_p2.py: parse BuildKit logs, registry logs and sizes into medians #!/usr/bin/env python3 """Summarize post 2 runs: parse BuildKit plain progress, registry logs and sizes; medians per cell.""" import json, os, re, statistics, sys root = sys.argv[1] VERTEX = re.compile(r"^#(\d+) (.*)$") DONE = re.compile(r"^DONE ([\d.]+)s$") SUBDONE = re.compile(r"^(preparing layers for inline cache|preparing build cache for export|exporting layers|pushing layers|exporting manifest list|exporting config).*?([\d.]+)s done$") def env(path): d = {} if os.path.exists(path): for line in open(path): if "=" in line: k, v = line.strip().split("=", 1) d[k] = v return d def parse_build(path): v = {} order = [] for line in open(path, errors="replace"): line = line.rstrip("\n") m = VERTEX.match(line) if not m: continue vid, rest = int(m.group(1)), m.group(2) if vid not in v: v[vid] = {"name": rest, "done": None, "cached": False, "error": False, "sub": {}} order.append(vid) continue if rest == "CACHED": v[vid]["cached"] = True elif rest.startswith("ERROR"): v[vid]["error"] = True else: d = DONE.match(rest) if d: v[vid]["done"] = float(d.group(1)) s = SUBDONE.match(rest) if s: v[vid]["sub"][s.group(1)] = v[vid]["sub"].get(s.group(1), 0) + float(s.group(2)) return [v[i] for i in order] def registry_bytes(path): got = put = 0 seen_logrus = False lines = open(path, errors="replace").read().splitlines() if os.path.exists(path) else [] for line in lines: if 'msg="response completed"' in line: seen_logrus = True meth = re.search(r"http\.request\.method=(\w+)", line) uri = re.search(r'http\.request\.uri="([^"]+)"', line) w = re.search(r"http\.response\.written=(\d+)", line) if meth and uri and w and meth.group(1) == "GET" and "/blobs/" in uri.group(1): got += int(w.group(1)) if not seen_logrus: for line in lines: m = re.search(r'"GET (/v2/[^]*/blobs/[^]*) HTTP/[\d.]+" (\d+) (\d+)', line) if m and m.group(2) == "200": got += int(m.group(3)) return got def step_time(vs, pattern): for x in vs: if re.search(pattern, x["name"]): return 0.0 if x["cached"] else x["done"] return None def run(d): r = env(os.path.join(d, "result.env")) if not r: return None vs = parse_build(os.path.join(d, "build.log")) steps = [x for x in vs if re.match(r"^\[(builder|stage-\d+) \d+/\d+\]", x["name"])] exp = [x for x in vs if x["name"].startswith("exporting cache to")] img = [x for x in vs if x["name"] == "exporting to image"] imp = [x for x in vs if x["name"].startswith("importing cache manifest")] info = { "rc": int(r["rc"]), "bootstrap_s": round(float(r["t1"]) - float(r["t0"]), 2), "build_s": round(float(r["t2"]) - float(r["t1"]), 2), "steps": len(steps), "cached_steps": sum(1 for x in steps if x["cached"]), "cached_names": [x["name"] for x in steps if x["cached"]], "apk_builder_s": step_time(vs, r"RUN apk add --update"), "npm_install_s": step_time(vs, r"RUN npm install"), "apk_final_s": step_time(vs, r"RUN apk add --no-cache nodejs"), "copy_modules_s": step_time(vs, r"COPY --from=builder"), "export_cache_s": sum(x["done"] or 0 for x in exp) if exp else None, "export_image_s": img[0]["done"] if img else None, "inline_prep_s": img[0]["sub"].get("preparing layers for inline cache") if img else None, "prep_export_s": sum(x["sub"].get("preparing build cache for export", 0) for x in exp) if exp else None, "import_manifest_s": sum(x["done"] or 0 for x in imp) if imp else None, "pulled_from_cache_registry_bytes": registry_bytes(os.path.join(d, "registry.log")), "errors": [x["name"] for x in vs if x["error"]], # a CACHED step still reports DONE time when its layers must be pulled and unpacked for a later step "cached_pull_s": max([x["done"] or 0 for x in steps if x["cached"]] or [0]), } if "cpu0" in r and "cpu1" in r: a = [int(x) for x in r["cpu0"].split()[1:9]] b = [int(x) for x in r["cpu1"].split()[1:9]] dd = [y - x for x, y in zip(a, b)] info["steal_pct"] = round(100 * dd[7] / sum(dd), 1) if sum(dd) else None if "cache_bytes" in r: info["cache_bytes"] = int(r["cache_bytes"]) info["cache_blobs"] = int(r["cache_blobs"]) for f in ("cache-size.json", "image-size.json"): p = os.path.join(d, f) if os.path.exists(p): try: j = json.load(open(p)) info[f.split(".")[0].replace("-", "_") + "_bytes"] = j.get("bytes") info[f.split(".")[0].replace("-", "_") + "_layers"] = j.get("layers") except Exception: pass return info def med(xs): xs = [x for x in xs if x is not None] return round(statistics.median(xs), 2) if xs else None out = {} for scen in ("cold", "src", "dep"): for cfg in ("none", "inline", "regmin", "regmax", "local", "grow", "growr"): d0 = os.path.join(root, scen, cfg) if not os.path.isdir(d0): continue runs = {rn: run(os.path.join(d0, rn)) for rn in sorted(os.listdir(d0))} runs = {k: v for k, v in runs.items() if v} meas = [v for k, v in runs.items() if k.startswith("r")] keys = ["build_s", "bootstrap_s", "cached_steps", "apk_builder_s", "npm_install_s", "apk_final_s", "copy_modules_s", "export_cache_s", "export_image_s", "inline_prep_s", "prep_export_s", "import_manifest_s", "cached_pull_s", "pulled_from_cache_registry_bytes", "steal_pct", "cache_bytes", "cache_size_bytes", "image_size_bytes"] cell = {"n": len(meas), "rcs": [x["rc"] for x in meas]} for k in keys: cell[k] = med([x.get(k) for x in meas]) vals = [x.get(k) for x in meas if x.get(k) is not None] if vals and k in ("build_s", "export_cache_s", "import_manifest_s"): cell[k + "_range"] = [min(vals), max(vals)] cell["runs"] = runs out[f"{scen}/{cfg}"] = cell json.dump(out, open(os.path.join(root, "summary.json"), "w"), indent=1) MB = 1e6 print(f"{'cell':14} {'n':>2} {'build':>7} {'range':>14} {'cached':>6} {'apkB':>6} {'npm':>6} {'expC':>6} {'expI':>6} {'impM':>5} {'pullMB':>7} {'cacheMB':>8} {'imgMB':>6}") for k, c in out.items(): cb = c.get("cache_size_bytes") or c.get("cache_bytes") print(f"{k:14} {c['n']:>2} {str(c['build_s']):>7} {str(c.get('build_s_range')):>14} {str(c['cached_steps']):>6} {str(c['apk_builder_s']):>6} {str(c['npm_install_s']):>6} {str(c['export_cache_s']):>6} {str(c['export_image_s']):>6} {str(c['import_manifest_s']):>5} {round((c['pulled_from_cache_registry_bytes'] or 0)/MB,1):>7} {round(cb/MB,1) if cb else '-':>8} {round(c['image_size_bytes']/MB,1) if c['image_size_bytes'] else '-':>6} rcs={c['rcs']}") Summary A fresh CI runner has no BuildKit cache, so the backend you pick decides what gets reused. For this multi-stage Node service, the cheapest backends did the most: inline and registry mode=min cut a one-line rebuild from 79.0 s to about 20 s and cost almost nothing to export, because BuildKit could skip the whole builder stage by matching cache keys alone. mode=max stored five times as much, added about 30 s of compression to every cold build, and did not make the dependency bump faster: pulling the cached toolchain took as long as installing it, and the export came on top. Before you switch on mode=max because a guide says so, read --progress=plain for your own build and compare the pull time of each cached step with the time it takes to run. _Originally published at devops-daily.com._
An OpenRTB bid floor keeps its own currency. --- title: "An OpenRTB bid floor keeps its own currency." published: true published_at: "2026-11-02T19:00:00Z" description: "Demonstrate why allowed bid currencies cannot substitute for an impression floor currency." tags: openrtb, json, testing, adtech series: Practical checks for adtech integrations --- A bid request can allow EUR responses while an impression's floor is still denominated in USD. If an integration reads the response currency list and silently applies it to the floor, its arithmetic can look correct while comparing different units. The problem is easy to miss because both values are ordinary JSON numbers. Their meaning depends on the currency attached to each field. This walkthrough uses OpenRTB 2.6's June 2026 specification snapshot. The examples focus on currency handling and are not complete bid requests or production pricing logic. Follow the field that owns the currency The request's cur field describes allowed bid response currencies. The impression's bidfloorcur describes the currency of that impression's floor. In the referenced snapshot, the latter defaults to USD when omitted. Those are separate contracts. Setting cur to ["EUR"] does not rewrite an omitted bidfloorcur to EUR. Consider this fragment: { "cur": ["EUR"], "imp": [ { "id": "video-1", "bidfloor": 3.20 } ] } For the impression floor, the omitted currency resolves to USD under the cited specification. A bid price expressed in EUR needs an explicit conversion before a numerical floor comparison makes sense. There is another scope to review when deals are involved. A deal has its own floor fields. Inspect the applicable deal and exchange contract rather than applying an impression-level assumption everywhere. Preserve the amount and currency together Avoid passing a bare number called floor through several functions. Use a structure that carries the amount, currency and source. That makes it harder for a later step to lose the unit or confuse an explicit value with a default. The following complete Node.js example performs a narrow comparison. The exchange rate is synthetic and is supplied by the caller: import assert from 'node:assert/strict'; function impressionFloor(imp) { const amount = imp.bidfloor === undefined ? 0 : imp.bidfloor; const currency = imp.bidfloorcur === undefined ? 'USD' : imp.bidfloorcur; if (!Number.isFinite(amount) || amount < 0) { throw new TypeError('invalid floor amount'); } if (!['USD', 'EUR'].includes(currency)) { throw new TypeError('unsupported currency in this example'); } return { amount, currency, currencySource: imp.bidfloorcur === undefined ? 'default' : 'explicit' }; } function convertFloor(floor, target, rates) { if (floor.currency === target) return floor.amount; const rate = rates[`${floor.currency}:${target}`]; if (!Number.isFinite(rate) || rate <= 0) { throw new Error('usable conversion rate missing'); } return floor.amount * rate; } const request = { cur: ['EUR'], imp: [{ id: 'video-1', bidfloor: 3.2 }] }; const floor = impressionFloor(request.imp[0]); const rates = { 'USD:EUR': 0.9 }; const floorInEUR = convertFloor(floor, 'EUR', rates); assert.equal(floor.currency, 'USD'); assert.equal(floor.currencySource, 'default'); assert.ok(Math.abs(floorInEUR - 2.88) < 1e-12); assert.equal(3.0 >= floorInEUR, true); assert.equal(3.0 >= floor.amount, false); assert.throws(() => convertFloor(floor, 'EUR', {})); assert.throws(() => impressionFloor({ bidfloor: '3.20' })); assert.throws(() => impressionFloor({ bidfloor: -1 })); assert.equal(impressionFloor({ bidfloor: 0 }).amount, 0); The two comparisons deliberately produce different answers. With this invented rate, a EUR 3.00 bid exceeds the converted EUR 2.88 floor. Comparing the same bid directly with the unconverted USD 3.20 number would reject it. The example supports only two currencies so that unsupported inputs fail visibly. A production implementation needs a maintained currency set, a rate source and an explicit rounding policy. Define the direction and age of the rate A rate named 0.9 is incomplete. State that it means EUR per USD, record when it became effective and identify the source. Multiplying by an inverse rate can produce plausible values without immediately revealing the error. Attach that metadata to the pricing decision or a retrievable rate snapshot. A later replay should use the rate policy that applied to the original decision, rather than whichever rate happens to be current when a developer investigates it. Do not treat a missing rate as one-to-one conversion. Decide whether the application should skip the impression, stop the calculation or route the case for review. That decision is business policy and should appear in the diagnostic result. Likewise, do not round a floor for display and reuse the displayed number in auction logic. Define the precision and comparison behavior required by your integration. Binary floating point, exchange rounding rules and boundary prices need deliberate treatment beyond this small example. Test defaults and explicit values separately An omitted currency and an explicit USD currency can lead to the same effective value while carrying different diagnostic meaning. Preserve which path was taken so you can find producers that rely on defaults unexpectedly. Include fixtures for a missing floor, a zero floor, an explicit non-USD currency and a malformed numeric string. Zero must survive as zero. A truthiness check such as amount || fallback can replace a legitimate value. Then add a request with multiple impressions and different floor currencies. This catches helpers that compute one request-wide currency and apply it to every impression. For deal traffic, keep dedicated cases with the deal identifier and applicable floor fields. The test should establish which floor the integration selected before it tests the comparison arithmetic. Debug a rejected bid with the normalized record When a bid appears to clear a floor but is rejected, collect the matched impression or deal, raw floor amount, effective floor currency, response currency, conversion snapshot and final comparison value. Check the units as well as the currency. OpenRTB pricing uses CPM conventions in these fields. An amount interpreted as a per-impression charge introduces a separate scale error that currency conversion cannot fix. Finally, distinguish your local eligibility calculation from the exchange's auction result. Clearing this one floor check does not establish that the bid is otherwise valid or that it should win. I maintain RTBlint. Its OpenRTB mistakes reference is useful for reviewing the surrounding request and response contract. Keep the currency decision in your own replay fixture so that a pricing investigation can reproduce the exact comparison. Sources - OpenRTB 2.6-202606, BidRequest and Imp Technical sources checked October 25, 2026. Drafted with AI; examples are synthetic unless explicitly stated otherwise.
Laya-CoreML: Open-weight typed decisions on Apple Silicon: Core ML, Neural Engine, zero generated tokens (1.6k stars) What it does All text below is quoted directly from the project README. >Local Laya typed decisions on Apple Core ML and Neural Engine. Validated ports, ~5 ms short decisions on M3 Max, reproducible speed and energy benchmarks. What else it does: - Language routing: Router() detects the language, picks a bundle and keeps up to two resident. You can register your own bundles. - Batches and long documents: predict_batch and predict_long, with answer attribution across windows. - Confidence gate: min_confidence= marks low-confidence answers for review without changing them. - Large choice sets: predict_tournament (no embedder) or predict_shortlist with your own embedding function. - Compute units: compute_units="cpu_gpu" | "cpu_ne" | "cpu" | "all" overrides a bundle's default engine. - Tools and services: CLI (laya-coreml predict), HTTP (laya-coreml-serve), MCP (laya-coreml-mcp-server), evaluation and calibration, and LangChain/LlamaIndex/CrewAI/Agno integrations, installed as extras. - Conversion: pip install 'laya-coreml[convert]' then laya-coreml convert exports your own bundle. >pip install laya-coreml Repository mizorewww/laya-coreml Repository stats |Metric|Value| |:-|:-| |Stars|1,618| |Forks|139| |Last release|v0.6.1 (2026-10-29)| |Languages|Python 99.7%, Rust 0.3%| |Contributors|3| |AI contributor accounts (Claude / Codex / Cursor / Copilot)|None| |AI co-authored commits|Claude: 5| Main contributor |Field|Value| |:-|:-| |Name|雨夹雪| |GitHub|@mizorewww| |Commits to this repo|25 (top contributor)| |Company / Location|Shanghai,China| |Followers|321| ────────────────────────────── 📌 If you want to browse more repos like this, we've organized them by category and rankings here: bestgithubrepositories.com 🗂️ We're also archiving repos where possible, so useful projects don't disappear when they're removed from GitHub.
I built a Python CLI that joins MTU probe evidence from both ends Small packets can succeed while larger traffic stalls, but a sender timeout alone leaves a lot unanswered. I built TunnelScope, an MIT-licensed Python CLI for controlled Linux MTU and packet-size experiments. It sends bounded UDP payloads to a cooperating receiver and saves both ends' observations in JSON and an offline HTML report. The part I just added joins sender and receiver observations by probe ID. It separates 'receiver saw the probe, sender got no ACK' from 'sender got no ACK and receiver recorded no arrival'. The second case is deliberately inconclusive unless receiver capture coverage is verified. The report also shows direction, payload size and per-attempt timestamps without assuming the hosts' clocks agree. The published v0.5.0 package has IPv4/IPv6 probes and bounded size search. The joined view and one-command sender-side diagnose workflow are on the development branch, not PyPI yet. I've tested isolated direct-link and blocked-feedback/ACK-return labs; real VPN and Kubernetes path validation is still open. This project and this post used AI assistance; the test results and limitations are documented in the repo. Repo and short terminal demo: lazypanic999/tunnelscope If you have debugged an MTU issue in practice, which piece of evidence would you want in this report before trusting it during an incident?
I built Buildbot for @OpenBot_ 🤖 Complex workflows took me too long to wire by hand. Now I tell Buildbot what the workflow must do, and it builds the steps on the canvas and tells me what it changed. PR 👇 openbot#4547 t.co